THE SCENE
Many things about Italian cooking involve family. Sharing. Loud conversations while laughing over nothing.
But this is not always the case.
For example, I waited an entire week to tell Keith …. a.k.a. Mr Picky … a.k.a. the man with the most hypochondria ever… about the eggs.
The raw eggs.
In the tiramisu.
It was mama’s lil’ family secret all week long.
Hear me out – my logic was sound.
First of all, I’d made the thing three times. Each time, it became exponentially more fabulous. My friends at the Girl Scouts practically swooned over the second version – I think the word used was “Luscious” – with a capital L. The third version made our friends Alan and Michelle weep.
Well, maybe not weep.
But eyes did roll. And thirds were administered to already full bellies. Right before bedtime. The night before a 6 am fishing trip.
Considering the tirimisu contained enough espresso and rum to jump start an entire marching band, this was a miracle of miracles.
Anyway – back to Keith and the raw eggs. After working so hard on the tiramisu, I didn’t want to spoil my chances of him trying it. And, if he did try it, I didn’t want to hear about his supposed stomach problems for the next few days. Nor was I in the mood for tall tales about how I had tried to poison him.
No, I couldn’t give his hypochondria-laden alter ego the upper hand on this one. So, I simply omitted the truth.
The next week passed quietly. No illness. No groaning. All I heard were a few happy remembrances of the the long-gone tiramisu.
When I finally did tell Keith, carefully explaining my motivations, it was like dropping a feather in the water.
No satisfying plunk. No shattering of worlds.
Just “Huh.”
Then, after a moment of silence, he teased: “I can’t believe you fed that to our baby.”
I laughed. He was grasping at straws.
“I didn’t. Remember? Tiramisu has espresso in it. Plus we ate it at 9pm. She was asleep. But if it didn’t and she wasn’t, I totally would have.”
“Huh,” he repeated.
I think he held his tongue because he knew. This tiramisu was something else. Flawless. A luscious cloud of goodness worth cracking the fridge open for at midnight. Worth a stolen scoop even if it means potentially losing a whole night’s worth of sleep.
Nope, he knew this was not something to tease me about.
And I knew what that meant.
He wanted me to make it again.
AVA’S CORNER
THE FOOD
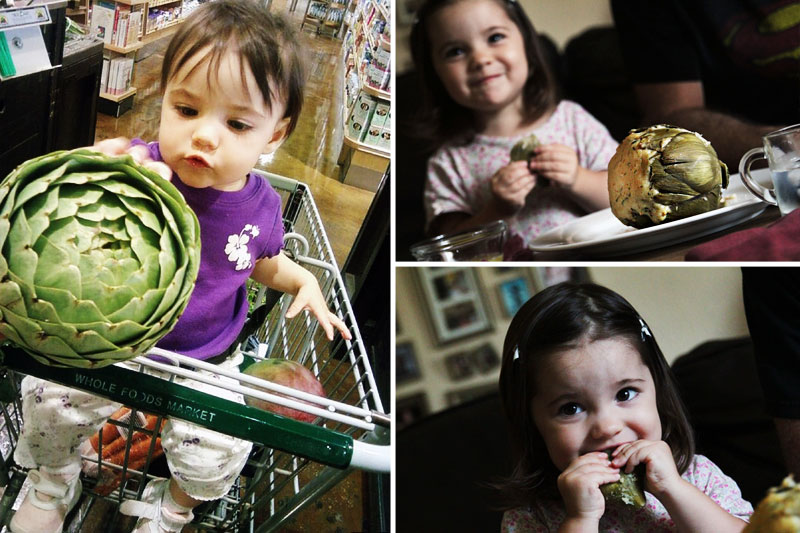
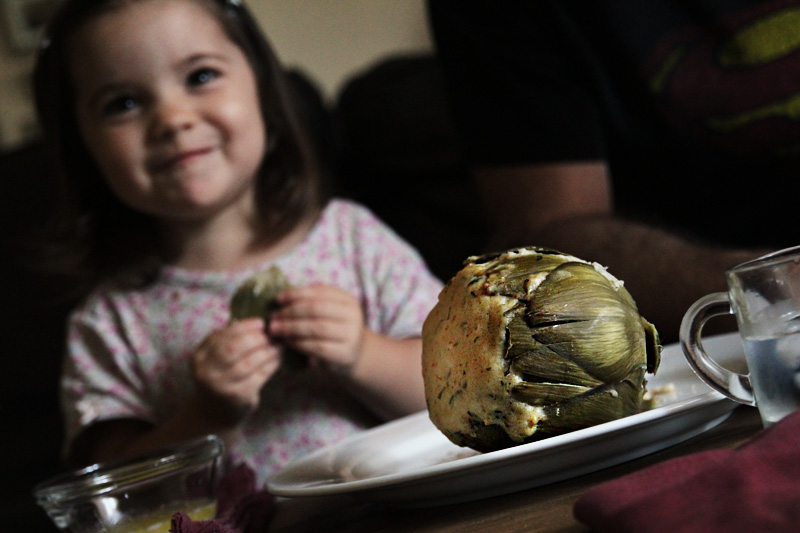
Stuffed Artichokes [recipe]

What I liked most about this dish:
There’s nothing better than curling up on the couch to watch a movie with a giant, stuffed artichoke, a bowl of melted lemon butter for dipping, and a giant bowl to throw the discard leaves in. It’s my Italian popcorn. It makes me smile that Ava loves them as well (already, at 2 years old, she can eat half an artichoke by herself). Keith even loves them, although he prefers garlic in his butter, not lemon juice.
What I liked least about this dish:
Artichoke season is rather short – they are best in the spring, although still decent in the summer. I would eat them every week if I could. Also, check to be sure they fit in your steamer pot before you stuff them. It can get messy otherwise.
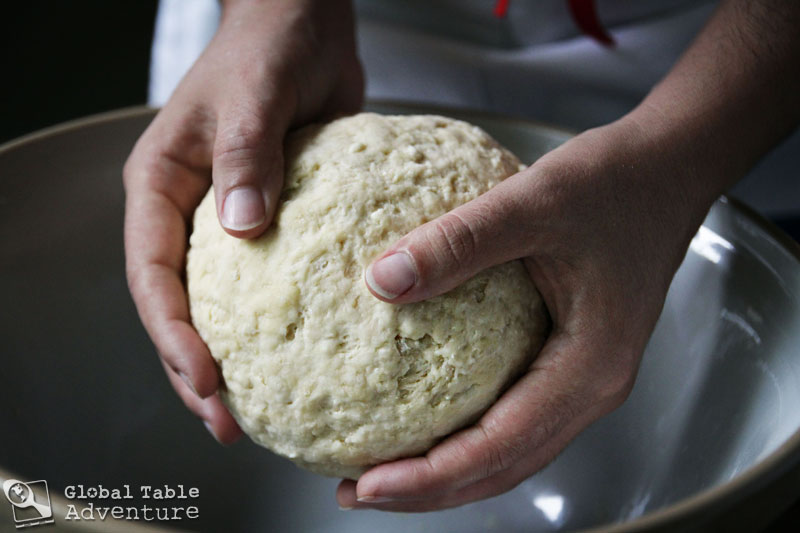
Homemade Pasta Dough [Recipe]

What I liked most about this dish:
While my great grandmother didn’t add water, I loved how a little bit makes this dough soft and easy to roll out. The flavor is outstanding.
What I liked least about this dish:
Nothing. Just be sure to continually dust with flour as you roll it out, and you’ll end up with a nice piece of dough for whatever project you want.
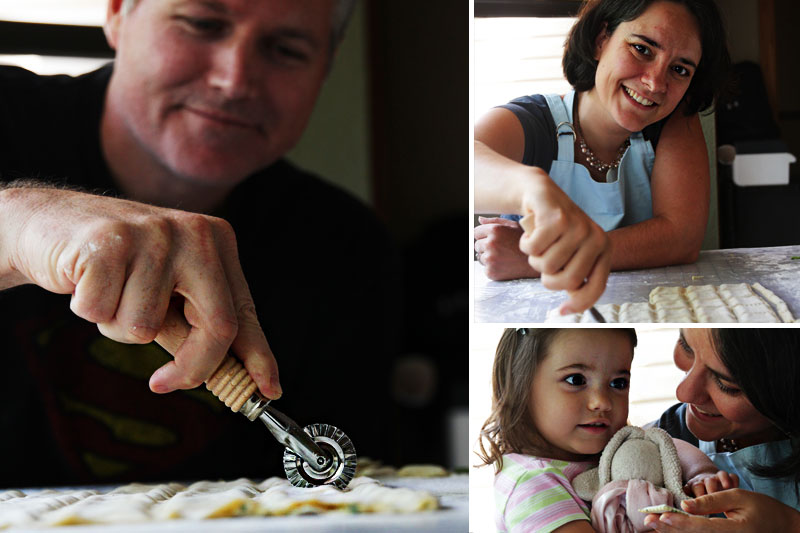
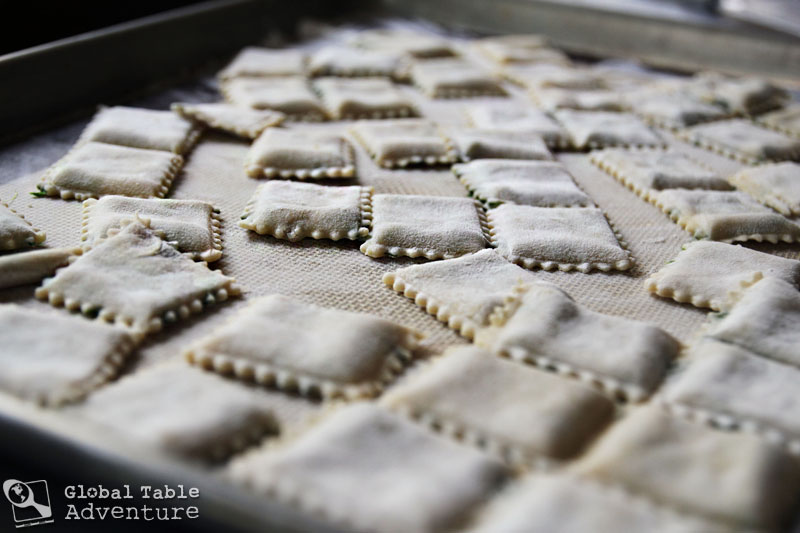
Alfred’s Pork Ravioli [Recipe]

What I liked most about this dish:
I’ll never buy ravioli again. I think I’m going to start a tradition of making these twice a year, just like my family did – for Thanksgiving and Easter.
What I liked least about this dish:
Nothing!
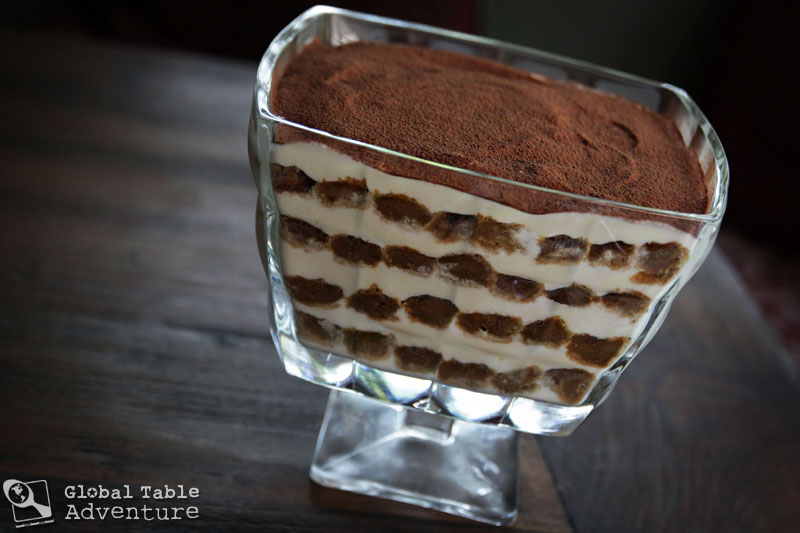
Tiramisu [Recipe]

What I liked most about this dish:
I never thought I’d like tiramisu much beyond okay. Turns out, with a few tricks and tips, this luscious dessert moves from soggy and boring to etheral and unctious. I also like that it is made ahead of time so that the day of the party there’s nothing to do (at least when it comes to dessert).
What I liked least about this dish:
Nothing.