Latest Posts

Menu: Ghana

I’m starting to think my closet will never be cleansed of my wooly, winter-wear. Sure, the sun is trickling down through the leaves, but the heater is on full blast. The last few days have dipped into the thirties overnight. Sunday afternoon we even brought my sad lemon tree back inside, straining to pull the giant bushy tree back over the threshold to prevent more leaves from dropping 0r, worse, yet, to avoid losing the baby lemons. Even my once-happy tomato plants are complaining of frost damage.

To think – just last month it was 93F.

What can I say. That’s Oklahoma weather for ya.

The good news is our Ghanaian menu is great for all weather conditions. Indeed, many Africans eat spicy, hot food, even in the summer. The logic? Spices and warm food in hot weather induces heavy sweating; when your forehead breaks out into a sweat, the droplets catch a breeze and cool you down. Brilliant.

Of course, it helps that many Ghanaians cook in outdoor kitchens.

What sounds good to you?

Red Red (Black eyed peas in red sauce) [Recipe]
Stewed black-eyed peas with curry, red palm oil, poblano peppers, onions, and tomatoes. Often served with fried plantains [Recipe]

Spicy Chicken Peanut Soup (Groundnut Soup) [Recipe]
Chicken simmered in stock lightly seasoned with natural peanut butter, hot peppers, onions, and tomatoes. You can make this as spicy or mild as you’d like. Great served plain or over rice.

Watermelon Lemonade [Recipe]
Burst into summer with this refreshing mixture of watermelon, fresh lemon juice and sugar, to taste.

All recipes and the meal review will be posted by Monday morning.

About the food of Ghana

I flipped through the digital photo album, well-worn despite being only a few years old. Inside, snapshots of Ghana, from the capital and beyond. I immediately focused in on the food.

“What’s this? And this?” I asked, excitedly, pointing at the glossy pages.

The album belonged to my friend Tara’s husband, Ryan. He had been to Ghana for research for work and, in the two weeks he spent there, he was able to sample many authentic dishes.

Wait. Is that a goat on a bike?

I sipped my wine, listening to his travel tales. Here’s my favorite one:

After several days of eating like a Ghanaian, Ryan feels a bit homesick and pops into a pizzeria. He orders a pie with his favorite topping – bell peppers, hoping to get a taste of “home.” The waiter delivers the pizza, piping hot, covered with dozens of neatly sliced pepper rings. The only problem? They were habeneros.

Wow.

When he calls for the waiter, the staff merely chuckle, stating the Indian tourists love their pizzas that way. Even after he picking the peppers off the pizza, each bite remained screaming hot, thanks to the juices that dripped down from the roasted habeneros.

Amazing. Needless to say, the pizza didn’t taste of “home.”

Ryan later sampled a more tame Ghanaian dish called Red Red – black eyed peas stewed with spices, peppers, onions, and a layer of red palm oil so thick it leaves a red ring around the plate (hence the name) [Recipe]. This would be a fun one to try on New Year’s Eve, instead of the typical black-eyed pea recipes. Red red is usually served with fried plantains [Recipe] – the ones in his photo album looked incredible, a deep golden brown – looking both sweet, salty and finger-licking good.

Peanuts are a big mainstay of Ghana – and make it’s biggest appearance in Groundnut soup (a.k.a. peanut soup) [Recipe]. This happy mixture of chicken, vegetables, and peanut butter can be found all over west Africa. Variations are made with fish and beef.

Then there’s the watermelons. There are so many watermelons, they pile up on the side of the road. Perfect for juicing [Recipe].

Photos: IngeligtvoetErik Kristensen, OneVillage Initiative, CIA World Factbook, Global Table Adventure.

Monday Meal Review: Germany

THE SCENE

My friend Amanda has the same philosophy as I do when it comes to kids and food: they’ll learn to love good food if you feed ’em good food.

That doesn’t mean it’s always easy. Recently Ava’s been turning her nose up at anything that looks funny – green, purple – whatever. The girl is simply not interested.

The other day I made her spinach ravioli and she didn’t want any part of it. After fifteen minutes of practically begging the girl to take a bite, I finally just asked her:

“Why won’t you eat it? Because it’s green!?”

Ava nodded her head violently. Then she laughed.

Then, most incredibly, she took a bite. And, then, another.

This week, as I spooned the mustard and pickle-filled beef rouladen and a small pile of red cabbage onto Ava’s plate, she looked skeptical. I thought I’d try the same tactic: to giggle at the unusual until she was curious enough to take a bite.

Ava’s Corner:

THE FOOD

Mini Beef Rouladen [Recipe]

What I liked most about this dish:

I love anything with tang, but combine it with a bold red wine gravy and I’m in bliss. Tucking a pickle into the rouladen amused me because I know how much Mr. Picky hates pickles (but loves mustard – I’ve yet to figure that one out). However, I told him there was also bacon, so that made up for it.

What I liked least about this dish:

I wish I could have found a butcher with a slicer so I could make bigger rouladen (I was shopping on Easter Sunday though, so very little my choices were limited). The pickle slices kept poking out the ends.

Eastern European Red Cabbage [Recipe]

What I liked most about this dish:

I love tangy cabbage. Case in point – I ate half of this dish by myself for lunch. Any dish that I can throw in a pot and forget about for an hour and a half (other than tossing it once or twice in the beginning) gets my vote.

What I liked least about this dish:

I had a hard time tossing the cabbage at first – it was stiff and filled up the entire pot. Spoons are useless; tongs are definitely the way to go. Ava wouldn’t touch this, even though I pointed out how the purple matched her purple pants. As for Mr. Picky? I encouraged him to eat an entire serving. He did, but confirmed he was still not a fan of the vinegar loaded cabbage.

How to homebrew: German Altbier (Beer) [Recipe]

What I liked most about this dish:

I made my own beer!

What I liked least about this dish:

Making my own beer.

German Tree Cake (Baumtorte) [Recipe]

What I liked most about this dish:

Every. Single. Thing. Even Keith is no “Mr. Picky” when it comes to this cake – it’s a favorite around these parts. Tip: slice it up and freeze the baumtorte if you don’t have 12 people to feed. The slices thaw quickly.

What I liked least about this dish:

Fact: I can’t have this every day for the rest of my life. Simply criminal.

How to homebrew: German Altbier (Beer)

I know very little about beer. So little, in fact, that I’ve been known to drink it on ice. While I’ve been told this is an epic sin, I can’t help myself. There’s nothing better after a hot, sweaty bike ride in the summer than beer on ice.

That being said, I thought our German Global Table was the perfect opportunity to take a stab at homebrewing. This  is my step-by-step eperience making German Altbier. I am using the Brewer’s Best kit which can be purchased at High Gravity in Tulsa, Oklahoma (you can also order from them online). If you purchase their kit, you’ll get the full instructions and my procedure might help along the way. At the very least, you’ll learn what not to do. They also have classes.

This isn’t an ad, by the way. I bought my own kit. High Gravity did loan me a bucket though! Hurrah for that. Now… if I can just get over there to return it.

Day 1:

First lesson… Apparently one needs a giant pot to homebrew. it’s called a Brew Kettle (go figure) and it easily holds 2.5 gallons. I thought I’d pinch my pennies, so I didn’t buy one. I was sure I’d have a big enough pot.

Ahem.

I have 1 pasta pot (1.5 gal), 1 smaller pot (1 gal), and, er, 1 asparagus pot (0.5 gal).

Note to self: never make beer in 3 small pots. What a pain in the neck.

Anyway, fill your pot(s) with water and warm them up…

Meanwhile, soften both cans of malt in a large bowl of hot water. This will make it easier to pour out.

Lesson two: Sanitize everything you’ll be working with. That’s what Amanda tells me.

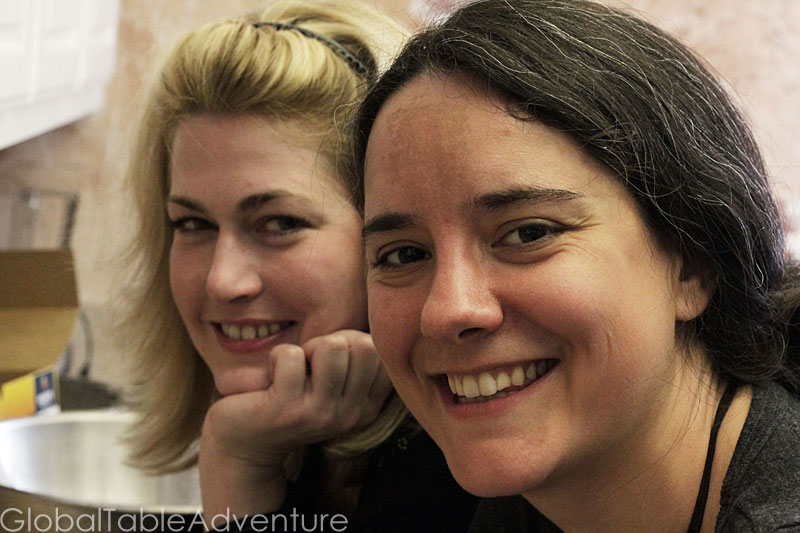
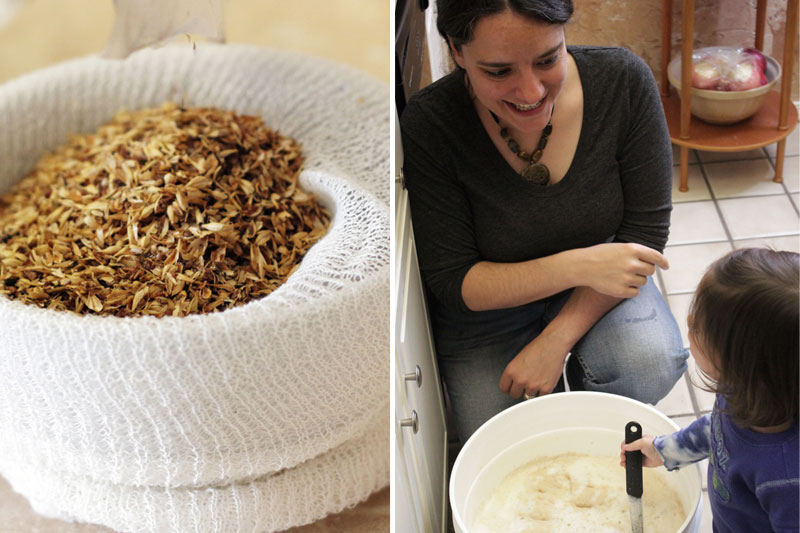
Which brings me to lesson three: the first time you homebrew, always have an experienced homebrewer on hand. It makes the whole process a lot easier and much more fun. Plus, you can get them to do most of the work. This is Amanda, getting ready to steep the grains (Brewer’s Best Step 3). Thanks, Amanda!

The temperature of the water should be 150-165F. If it’s too hot you’ll end up with bitter beer. And not in a good way … so don’t let it simmer.

After 20 minutes, remove the grains, letting the liquid drain out. Don’t squeeze.

The water infused with grains now has a fancy new name: wort.

Not the most appetizing, if you ask me. Then again, neither is this picture…

Next, bring the wort to a boil. Add both cans of softened malt. Return to a boil and stir thoroughly. Do not let it boil over.

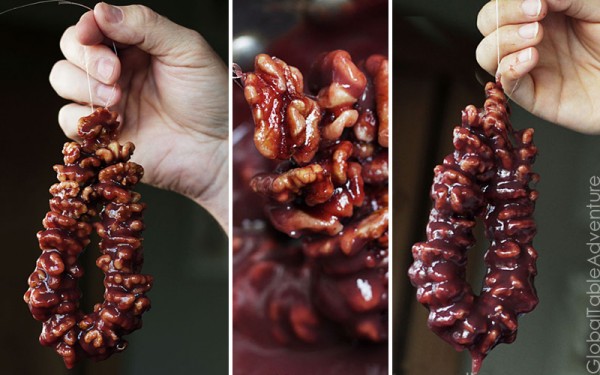
Add the bittering hops and boil for 35 minutes. Then add the flavoring hops and cook for 20 minutes. We put the hops in cheesecloth to make it easier to remove from the wort. Tip: reuse the cheesecloth from the grains (cutting it in half, to make two bags)

To be honest, Amanda did most of this. She’s a rockstar.

Here’s my contribution: hops looks a lot like bunny food. Num num.

Place the pots of liquid in an ice bath. You want to cool the wort down to 70F and then add it to your brew bucket. Add more water, until it reaches the 5 gallon mark. Take the temperature again and make sure it’s still around 70F.

Sprinkle the yeast over the top and stir with sanitized spoon.

Ava wanted to help, so I let her stir.

Next, cover the bucket, add water to the little plastic airlock and place in the hole. This doo-hickie bubbles and lets you know if the yeast is working.

Day 2-3

I have no idea where the beer is. Keith cleaned up the kitchen. Surely he didn’t throw it out? Will have to ask him if he’s seen it.

Day 4

Found the beer in the laundry room. I wait a few minutes for a sign of life in the beer bucket. It’s supposed to bubble.

Nothing.

Just when I am about to give up, five bubbles pop up. Nearly gives me a heart attack.

Days 5-10

Fret over the beer for no particular reason. Then, Ava pushes on the bucket several times, forcing bubbles to rocket out. Call Amanda in a panic. Apparently, all will be fine. Waiting is the name of the game.

Day 11

All this time the yeast has been working. We check the “gravity” now and later, right before bottling – which will tell us how much alcohol is in the beer.

Next, we move the beer to another bucket, to clarify it. You see, while the yeast works, it also makes gunk at the bottom of the bucket – gunk you won’t want to drink.

The easiest way to remove the gunk is to siphon the liquid from one bucket to another.

Amanda insisted I do it. I must have lost a bet.

Sucking on the siphon gets the air moving and pulls liquid from one bucket (placed up high), to another bucket, preferably with a spigot (placed down low). It also gave me an accidental taste of the beer. Yummy.

Ava likes the bubbles.

What’s left, after siphoning, you ask? Yeasty sludge. You can go ahead and wash out the yeasty sludge, unless you can think of something to do with it…

Cover up the fresh bucket of beer again and set it aside.

Day 12-21

Come down with the flu. Forget all about the beer.

Day 22

Morning: Finally got around to bottling the beer. Amanda is so sick she can’t come help. Darn.

First, all the bottles must be sanitized, inside and out.

And the caps should be boiled for a few minutes.

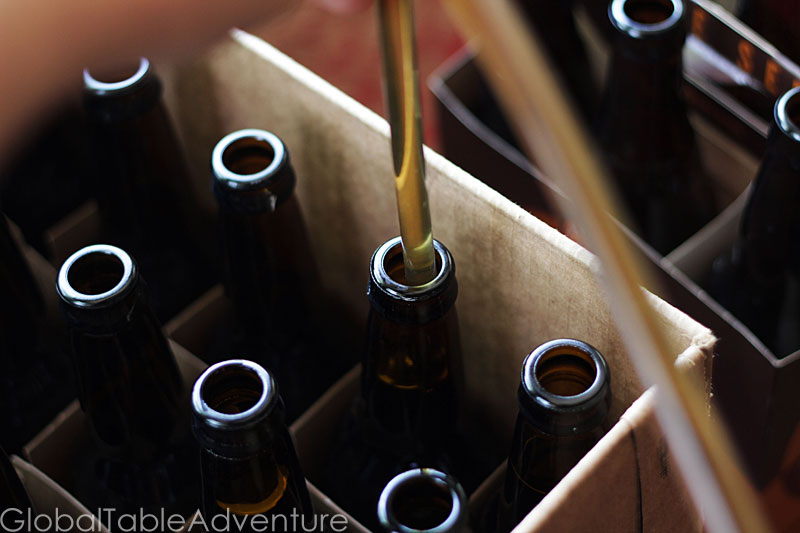
Then you need to add the priming sugar to the bucket. This will start the yeast eating again, to make carbonation. It is easier to distribute the sugar evenly if you heat it up with a 1/4 cup water until fully dissolved. Stir the sugar/beer mixture thoroughly and siphon into the sanitized bottles.

The tube at the end of the siphon is called a “bottle filling wand” – it magically let’s you fill the bottle to the exact right level.  The right equipment is definitely a must when making beer. Luckily you can get it all for under $100. OR you can borrow it from a friend. Thanks, again, Amanda! (She even loaned me her bottles!).

Once you get everything capped, spend the afternoon whistfully staring at the pretty bottles.

Up to 2 weeks later:

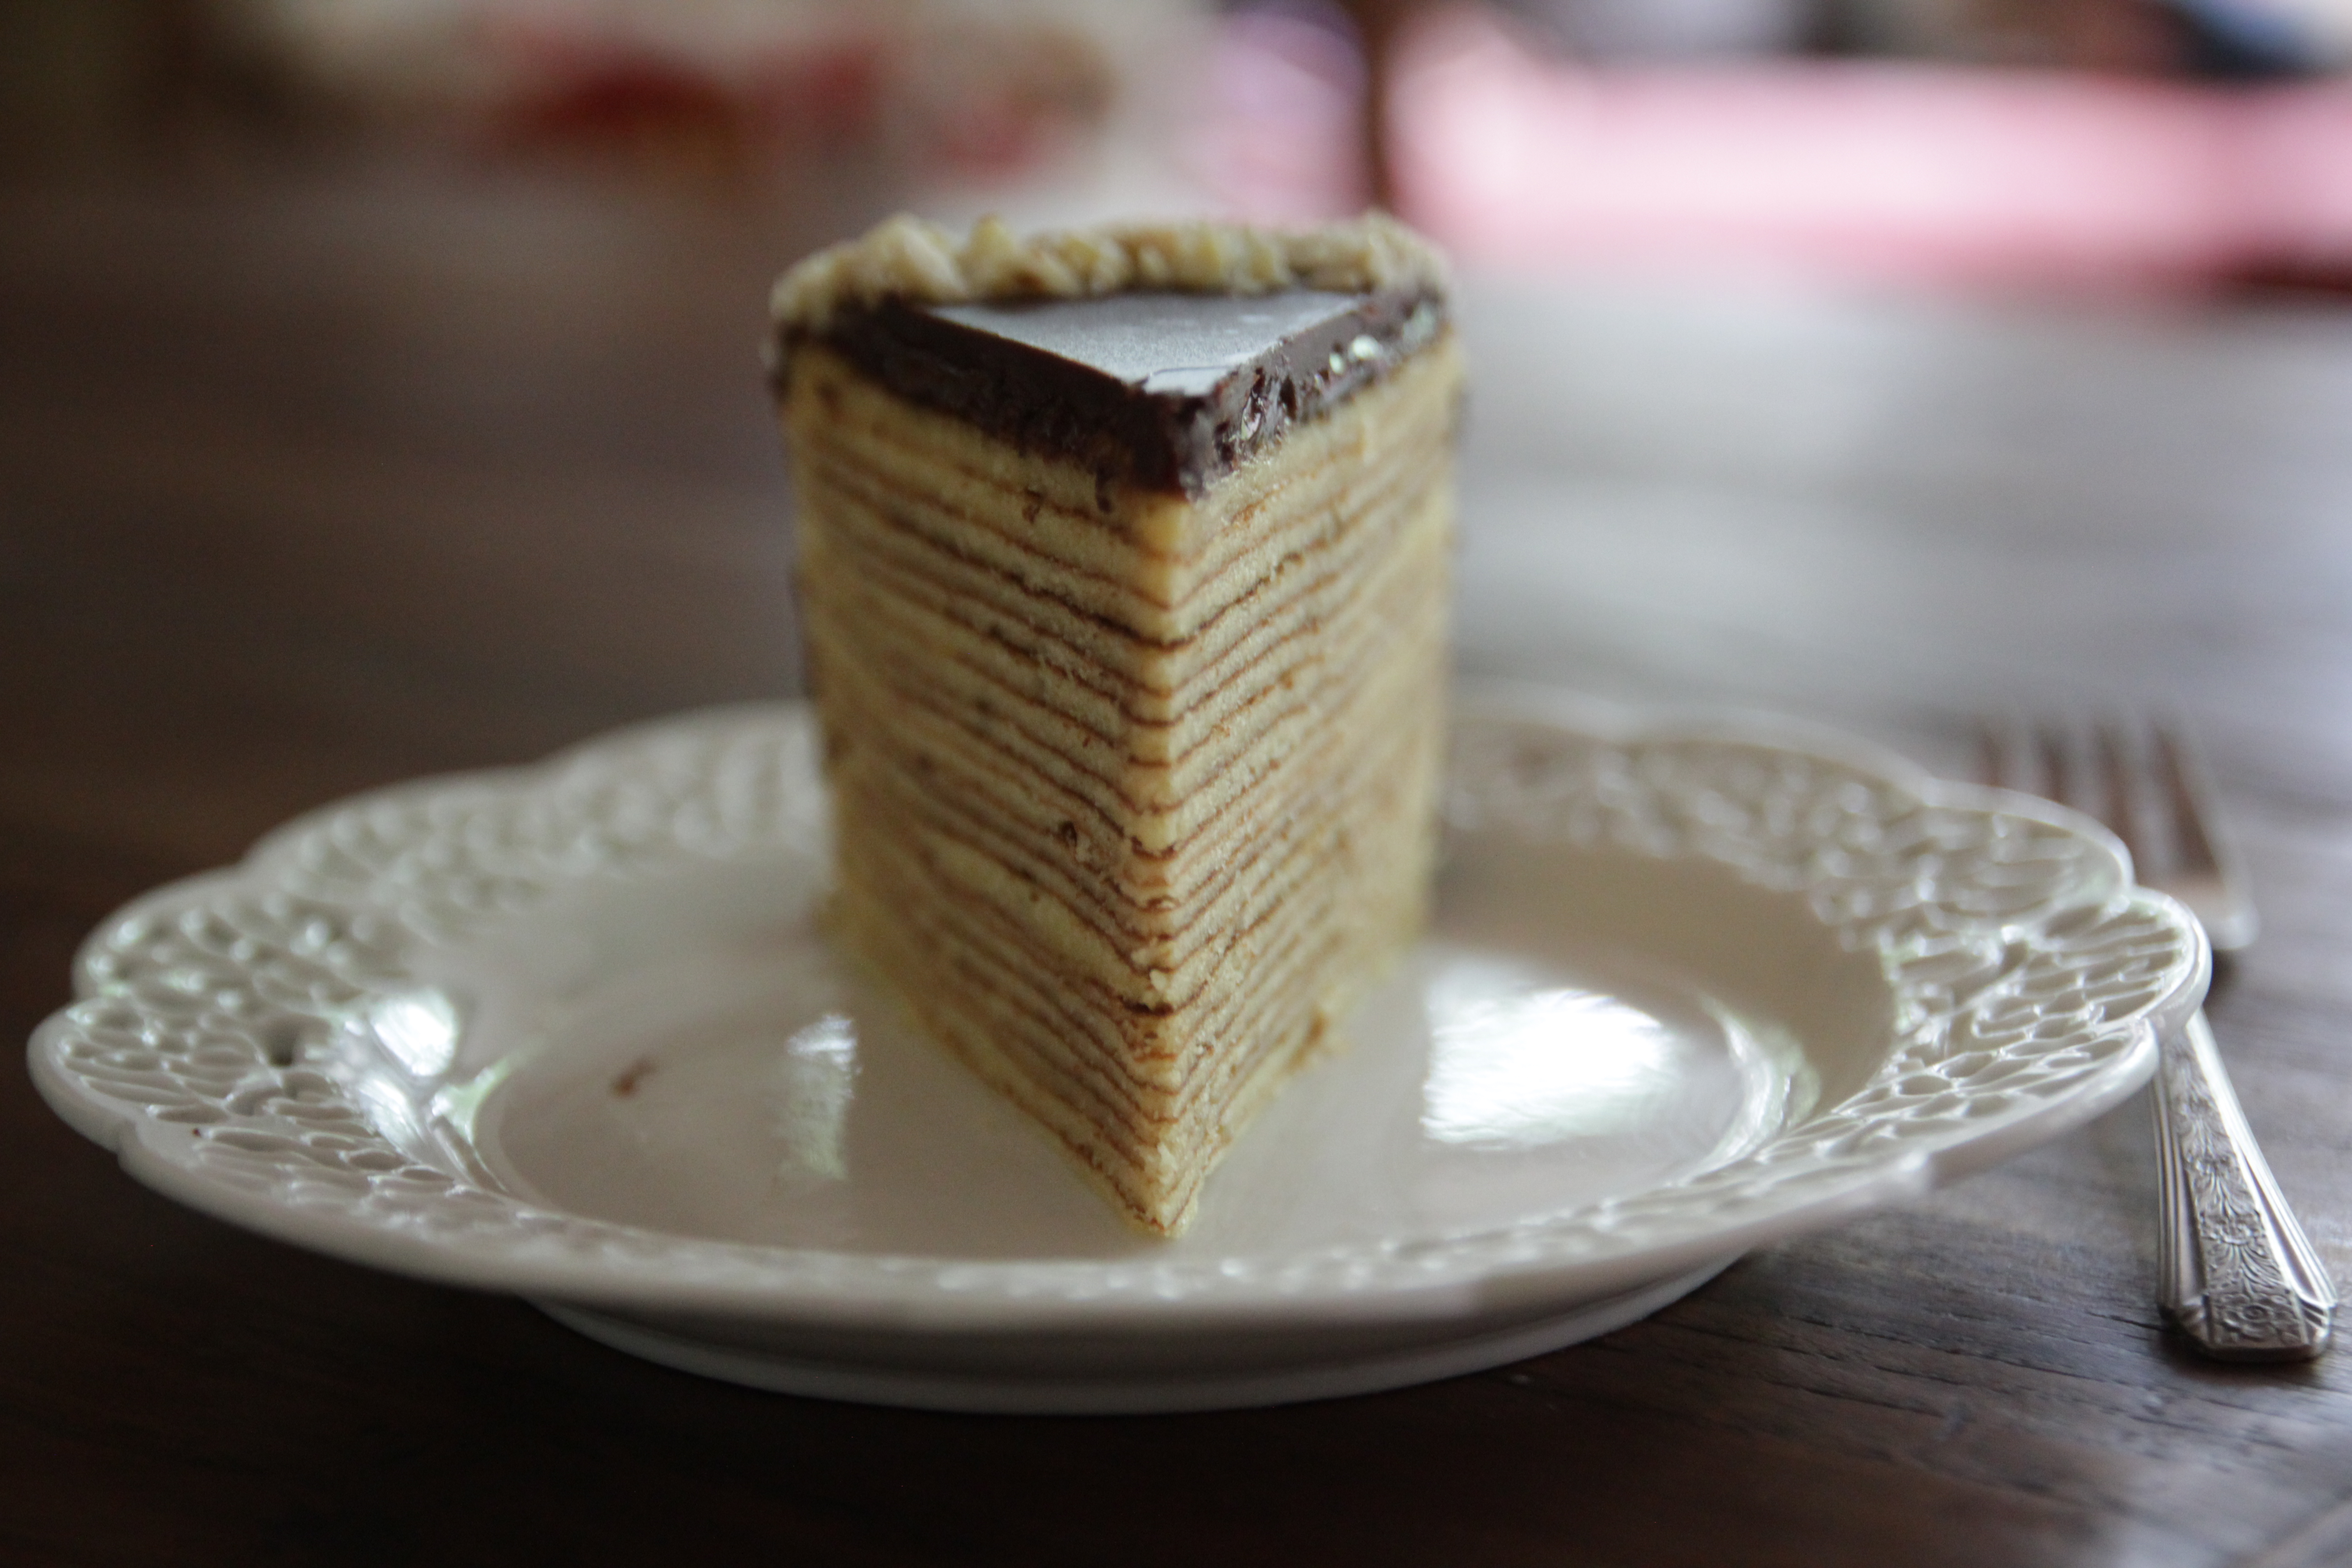
Enjoy on a hot day. The ice is up to you…

I’ll add a final photo when the beer finishes carbonating. I can’t wait!

Mini Beef Rouladen

Serves 2-4

Welcome to Germany! Mustard, pickles, onions, bacon, and the beefiest beef you can find – all tucked into a luscious gravy and served with red cabbage [Recipe] and potatoes.

First, a few tips.

  • Rouladen should be made with wide strips of tough beef -the kind that benefits from slow cooking. Typically this is round steak, but my supermarket only had chuck roast.
  • The meat should be about 4″ wide and very long and thin. Have your butcher cut it for you. If you think of the meat like a brick, they should be cutting strips from the widest part of the brick. They’ll only be able to do it if they have a slicer. Our butcher didn’t have a slicer, so they couldn’t cut wide slices – they had to cut from the skinny side. No problem – we just made mini rouladen.
  • When you get it home pound it as thin as you can.
  • Only simmer the rouladen until the beef is tender. You might want to make one or two extra so you can taste test after about 30 minutes of simmering.

Ingredients:

1 small onion, diced
1lb chuck roast, sliced & pounded thin (about 8 strips)
8-12 tsp spicy german mustard
4 dill pickles, halved lengthwise
2 strips bacon, quartered
butter, for frying (about 1 Tbsp)
3 cups beef stock
1 cup red wine
2 cups beef stock
1/8 cup flour (or to taste, to thicken gravy)

Method:

Play some German music, preferably not this song. Unless you like cute German men in tight clothes being completely absurd. Actually, he’s probably not even German. So definitely not that song.

Next, spread the beef strips with the spiciest mustard you can find, top with chopped onion, a strip of bacon, and half a dill pickle.

Roll up the rouladen and secure with a toothpick. If you had wider strips of beef, you could fold up the long edges too, to keep the filling in better.

Add some butter, the rouladen, and the leftover onions to a large, hot skillet. Brown beef.

Next, add wine and beef stock.

Cover and simmer until tender. This took 45 minutes for us. It might take you less or more time, depending on how tough your cut of meat was.

Next, remove the rouladen and keep warm. Make a gravy with the cooking liquid by adding a flour slurry to the hot braising liquid. Simmer until thick. Return rouladen to pan and coat with gravy.

Serve immediately. Preferably with a cute German man. If you’re single, that is.

Mini Beef Rouladen
Votes: 0
Rating: 0
You:
Rate this recipe!
Print Recipe
Welcome to Germany! Mustard, pickles, onions, bacon, and the beefiest beef you can find – all tucked into a luscious gravy and served with red cabbage [Recipe] and potatoes.
Servings
2-4 people
Servings
2-4 people
Mini Beef Rouladen
Votes: 0
Rating: 0
You:
Rate this recipe!
Print Recipe
Welcome to Germany! Mustard, pickles, onions, bacon, and the beefiest beef you can find – all tucked into a luscious gravy and served with red cabbage [Recipe] and potatoes.
Servings
2-4 people
Servings
2-4 people
Ingredients
  • 1 small onions , diced
  • 1 lb chuck roast , sliced & pounded thin (about 8 strips)
  • 8-12 tsp spicy German mustard
  • 4 dill pickles , halved lengthwise
  • 2 strips bacon , quartered
  • 1 Tbsp butter , for frying
  • 5 cups beef broth
  • 1 cup red wine
  • 1/8 cup all-purpose flour (or to taste, to thicken gravy)
Servings: people
Units:
Instructions
  1. Spread the beef strips with the spiciest mustard you can find, top with chopped onion, a strip of bacon, and half a dill pickle.
  2. Roll up the rouladen and secure with a toothpick. If you had wider strips of beef, you could fold up the long edges too, to keep the filling in better.
  3. Add some butter, the rouladen, and the leftover onions to large, hot skillet. Brown beef.
  4. Next, add wine and beef broth.
  5. Cover and simmer until tender. This took 45 minutes for us. It might take you less or more time, depending on how tough your cut of meat was.
  6. Next, remove the rouladen and keep warm. Make gravy with the cooking liquid by adding a flour slurry to the hot braising liquid. Simmer until thick. Return rouladen to pan and coat with gravy.
Recipe Notes

A few tips.

  • Rouladen should be made with wide strips of tough beef -the kind that benefits from slow cooking. Typically this is round steak, but my supermarket only had chuck roast.
  • The meat should be about 4″ wide and very long and thin. Have your butcher cut it for you. If you think of the meat like a brick, they should be cutting strips from the widest part of the brick. They’ll only be able to do it if they have a slicer. Our butcher didn’t have a slicer, so they couldn’t cut wide slices – they had to cut from the skinny side. No problem – we just made mini rouladen.
  • When you get it home pound it as thin as you can.
  • Only simmer the rouladen until the beef is tender. You might want to make one or two extra so you can taste test after about 30 minutes of simmering.

Eastern European Red Cabbage

Serves 6

There’s one thing I know for sure. This recipe is served all over Germany and other eastern European countries. You almost don’t have to look at a menu before ordering it (unless, of course, you’re eating at a Chinese restaurant in Germany). Red cabbage is super simple to make -the hardest part is cutting the cabbage. And that’s not very hard. Unless you don’t have a knife.

Ingredients:

1 head red cabbage, cored and sliced thinly (about 3 lbs)
1 small onion, thinly sliced
1 cup water
1/2 cup vinegar
1/4 cup sugar
1 bay leaf
Salt
pepper

Method:

Today is the day you get to take out your anxiety on a small purple cabbage. It’s loads of fun.

First, core and slice it.

Next, add it to a large pot with sliced onions, sugar, vinegar, and a bay leaf.

A little water, salt and pepper balance things out.

Simmer for 1 1/2 hours or until the cabbage is as tender as you’d like, tossing occasionally. I found tongs the best way to “stir” the cabbage.

Now, I have to warn you. That’s what friends do.

I ate half of this recipe for lunch one day. My bladder will never be the same.

Let’s just say … there’s a lot of liquid in cabbage.

Sorry for sharing that, but I thought you should know.

Eastern European Red Cabbage
Votes: 1
Rating: 5
You:
Rate this recipe!
Print Recipe
There’s one thing I know for sure. This recipe is served all over Germany and other eastern European countries. You almost don’t have to look at a menu before ordering it (unless, of course, you’re eating at a Chinese restaurant in Germany). Red cabbage is super simple to make -the hardest part is cutting the cabbage. And that’s not very hard. Unless you don’t have a knife.
Servings
6 people
Servings
6 people
Ingredients
  • 1 head red cabbage , cored and sliced thinly (about 3lbs)
  • 1 small onions , thinly sliced
  • 1 cup water
  • 1/2 cup vinegar
  • 1/4 cup sugar
  • 1-2 bay leaves
  • salt
  • pepper
Servings: people
Units:
Instructions
  1. Core and slice your cabbage and add it to a large pot with sliced onions, sugar, vinegar, and a bay leaf.
  2. Add a little water, salt, and pepper and simmer for 1 1/2 hours or until the cabbage is as tender as you'd like, tossing occasionally.

I’ll take my meat with cookies, thank you.

Pull up your chair to the German dinner table and you’ll likely eat a heaping plate of meat and potatoes. You might even encounter a crunchy gingersnap or a soft, spicy gingerbread cookie [Recipe]. What you might not expect, however, is that your cookies could be in your meat dish.

That’s right.

The German dish called Sauerbraten is a slow-cooked pot roast, loaded up with vinegar and a rich, brown gravy thickened with nothing more than cookies. But let’s start at the beginning, shall we?

  • First, the meat hangs out in a vinegar bath for a week and a half, along with a healthy sprinkle of pickling spices.
  • Second, the meat is slow-cooked with the vinegar mixture in a hot oven.
  • Third, the vinegar mixture is strained and simmered with finely crushed gingersnaps to make a spicy, tangy brown gravy.

Amazing. I must eat this dish as soon as possible.

What about you? Would you try it?

Happy Fun Fact Friday!

Have a great weekend… hope you have something fun planned.

Photo of Sauerbraten: Johann H. Addicks

German Tree Cake | Baumtorte / Baumkuchen

This is my favorite cake. All 21 layers of it. It has been since my mitten-wearing years. My mom used this intricately layered almond and chocolate cake as an activity for us kids – something to keep us busy on rainy mornings, when crayons had lost their interest. It is single-handedly responsible for my obsession with almond paste (and it’s sweeter counterpart, marzipan).

The original recipe might as well be called “the dance of dirty bowls.” I took a hacksaw to the method, removing five extra bowls. Your baby soft hands will thank you. The best part? No cake goodness was harmed in the streamlining of this recipe.

NOTE: You need two days to make this cake because the cake needs to chill in the fridge overnight.

Serves 12
Ingredients:

All ingredients should be room temperature

1 1/2 cups almond paste, tightly packed (12 oz)
6 Tbsp half & half
1 1/2 sticks butter (12 tbsp), softened
1 cup sugar
10 eggs, separated (put the whites in a bowl big enough to whip them up to stiff peaks)
1 1/2 tsp vanilla extract
1 cup cake flour
3/4 cup cornstarch

10 0z jar apricot jam
1 cup slivered almonds, coarsely chopped.

For the chocolate glaze:

3 Tbsp butter
1 Tbsp rum, preferably dark
1 1/2 tsp vanilla extract
1 Tbsp light corn syrup
3 oz semi-sweet chocolate chips

Method:

Any recipe that includes almond paste has my heart. Fun fact: I always have almond paste on hand; it keeps indefinitely in an air tight container in the fridge. For years, even.

In the bowl of a standing mixer fitted with the paddle attachment, beat the almond paste with half and half, one tablespoon at a time. It will resemble mashed potatoes when you’re done.

Next, beat in softened butter until fluffy, scraping the bowl to make sure its all mixed in.

I dare you not to sneak one (or fifteen) tastes of this batter.

Next, beat in the sugar. Scrape down the sides. Ponder the square root of 48. Sneak another taste of the batter.

Next, incorporate the happy balls of sunshine, one at a time.

Don’t forget to splash in the vanilla. You can never have too much vanilla. Be sure to dab a little on your wrists and behind your ears.

Next, sift in the flour and cornstarch in thirds. Beat until well incorporated, scraping the bowl as needed.

Next, beat the egg whites until they make stiff peaks, but aren’t dry. This is where it’s nice to own a hand mixer, since the standing mixer has your other ingredients in it.

Let’s play a game. What do you see in these egg whites? I see a ram’s head.

Once you’re done day dreaming, fold the egg whites into the batter until it looks and tastes like an almond paste cloud.

How to bake the cake:

Now for the fun part. Get your broiling shoes on.

Turn on the broiler and let it warm up for a few minutes. Meanwhile, grease and line a 9″ springform pan with parchment paper. Use more butter than I did, or your paper will curl.

Next, spread 1/4 cup of batter in the bottom of the pan.

Broil this layer until deep golden brown.

Then, add another 1/4 cup batter. Spread it out with a brush and broil, as before.

NOTE: Get your layers browner than pictured below or the layers won’t be distinct. If you look at my final cake pictures, you’ll see I eventually went darker with the layers. The highest ones show up much better than the ones at the very bottom of the cake.

After repeating this step a few times, spread a layer with a bit of apricot jam. Continue making a few layers of cake to every layer of jam, until half the jam is used up.

Be sure to push the batter evenly around so the cake remains flat. Doming cakes are forbidden. You can correct as you go.

Refrigerate overnight.

The next day: bedazzle the cake

Spread the top and sides of cake with the remaining half of apricot jam. Set in refrigerator while making chocolate glaze.

Melt butter in a small saucepan. Add corn syrup (if you have a non corn syrup glaze recipe, I’d be interested in seeing it)…

…vanilla extract and rum. Dark rum is better but I didn’t have any. Simmer a few minutes to let the ingredients mingle.

Remove from heat and toss in the chocolate chips. Be sure to replace any casualties that get lost in your mouth along the way. Cover five minutes, or until the chocolate is completely softened.

Stir the glaze until glossy and pour evenly over top and sides of cake. The sides can be ugly – they’ll get covered with almonds. Hurrah for that!

Press crushed almonds over the sides and outer edge of cake. Refrigerate to set the glaze.

Slice… and serve with a giant smile. You did it!

Enjoy on a rainy day, with a cup of hot tea, a garden view and some dreamy piano music. I like it best straight from the refrigerator, with a chilly nip to it, although you could eat it room temperature, too.

This is a dense, rich cake. Small slices are recommended but not required.

Enjoy this, your very own fairy tale… with a view of another, German one.

Castle Hohenzollern. Photo from between 1890 and 1905, by Photoglob AG, Zürich, Switzerland or Detroit Publishing Company, Detroit, Michigan.

Castle Hohenzollern. Photo from between 1890 and 1905, by Photoglob AG, Zürich, Switzerland or Detroit Publishing Company, Detroit, Michigan.


German Tree Cake | Baumtorte / Baumkuchen
Votes: 16
Rating: 3.63
You:
Rate this recipe!
Print Recipe
This is my favorite cake. All 20 layers of it. It has been since my mitten-wearing years. My mom used this intricately layered almond and chocolate cake as an activity for us kids – something to keep us busy on rainy mornings, when crayons had lost their interest. It is single-handedly responsible for my obsession with almond paste (and it’s sweeter counterpart, marzipan). NOTE: You need two days to make this cake because the cake needs to chill in the fridge overnight.
Servings Prep Time
12 people 45 minutes
Cook Time Passive Time
1 hour 2 days
Servings Prep Time
12 people 45 minutes
Cook Time Passive Time
1 hour 2 days
Ingredients
For the cake:
  • 1 1/2 cups almond paste , tightly packed (12 oz)
  • 6 Tbsp half and half
  • 12 Tbsp butter
  • 1 cup sugar
  • 10 eggs , separated (put the whites in a bowl big enough to whip them up to stiff peaks)
  • 1 1/2 tsp vanilla extract
  • 1 cup cake flour
  • 3/4 cup cornstarch
  • 10 oz apricot jam
  • 1 cup slivered almonds , coarsely chopped
For the chocolate glaze:
  • 3 Tbsp butter
  • 1 Tbsp rum , preferably dark
  • 1 1/2 tsp vanilla extract
  • 1 Tbsp light corn syrup
  • 3 oz semi-sweet chocolate
Servings: people
Units:
Instructions
Day 1
  1. In the bowl of a standing mixer fitted with the paddle attachment, beat the almond paste with half and half, one tablespoon at a time. It will resemble mashed potatoes when you’re done. Next, beat in softened butter until fluffy, scraping the bowl to make sure its all mixed in.
  2. Next, beat in the sugar. Scrape down the sides and add yolks, one at a time, and vanilla extract.
  3. Next, sift in the flour and cornstarch in thirds. Beat until well incorporated, scraping the bowl as needed.
  4. In another bowl, beat the egg whites until they make stiff peaks, but aren’t dry. This is where it’s nice to own a hand mixer, since the standing mixer has your other ingredients in it.
  5. Fold the egg whites into the batter until it looks and tastes like an almond paste cloud.
How to bake the cake:
  1. Turn on the broiler and let it warm up for a few minutes. Meanwhile, grease and line a 9″ springform pan with parchment paper.
  2. Next, spread 1/4 cup of batter in the bottom of the pan. Broil this layer until deep golden brown. Then, add another 1/4 cup batter. Spread it out with a brush and broil, as before. NOTE: Get your layers browner than pictured below or the layers won’t be distinct. If you look at my final cake pictures, you’ll see I eventually went darker with the layers. The highest ones show up much better than the ones at the very bottom of the cake.
  3. After repeating this step a few times, spread a layer with a bit of apricot jam. Continue making a few layers of cake to every layer of jam, until half the jam is used up.
  4. Be sure to push the batter evenly around so the cake remains flat. Doming cakes are forbidden. You can correct as you go. Refrigerate overnight.
Day 2
  1. Spread the top and sides of cake with the remaining half of apricot jam. Set in refrigerator while making chocolate glaze.
  2. Melt butter in a small saucepan. Add corn syrup, vanilla extract, and rum. Simmer a few minutes. Remove from heat and toss in the chocolate chips. Be sure to replace any casualties that get lost in your mouth along the way. Cover five minutes, or until the chocolate is completely softened.
  3. Stir the glaze until glossy and pour evenly over top and sides of cake. The sides can be ugly – they’ll get covered with almonds.
  4. Press crushed almonds over the sides and outer edge of cake. Refrigerate to set the glaze. Slice… and serve with a giant smile. You did it!
Recipe Notes

All ingredients should be room temperature.

Menu: Germany

If you’re feeling a bit overwhelmed at the thought of spring cleaning, try making these recipes, especially the beer and cake. Good luck. If you’re as clumsy as a frog, as I am, you’ll be cleaning up half-fermented beer splatters and chocolate drips for days.

Squeak, shluck, squeak, shluck. That’s the sound of my sneakers on sticky tiles.

Shudder.

Of course, the final result allows you to eat and drink your sorrows away, so there’s that. Or you could just not be clumsy in the first place. Your choice.

Mini Beef Rouladen [Recipe]
Thin strips of beef spread with spicy mustard and rolled up around diced onions, bacon, and a piece of pickle. Served in a red wine gravy.

Eastern European Red Cabbage [Recipe]
The easy, ever popular cabbage dish – simply slice and cook with a bit of vinegar, sugar, and water. The bay leaf is for good luck.

How to homebrew: German Altbier (Beer) [Recipe]
This isn’t so much a recipe as a photo journal of my first attempt at brewing beer with ingredients from High Gravity. Fun, fun!

German Tree Cake (Baumtorte) [Recipe]
This cake has so many layers, it is said they look like the rings of a tree. Made with marizipan (almond paste), apricot jam (just a touch), and a thin chocolate glaze. My idea of heaven.

All recipes and the meal review will be posted by Monday morning.

About the food of Germany

The Saar River in Germany

I first went to Germany for a basketball tournament. I’d just made Captain of the J.V. team, thanks in great part to the small size of our school rather than any particular skill. That weekend we played with “heart” as our coach liked to say, losing by a mere 12 points – a definite improvement since the beginning of the season when we had lost several games by well over 30 points.

That kind of loss is a creaming and, unfortunately, not the kind that ends up in cake.

Düsseldorf, Germany

After Friday’s game my host family took me on a walking tour of downtown Düsseldorf. The air was crisp and dark – twinkling with the occasional string of lights. Our feet echoed along the cobblestones. Just when my eyes began to droop, the street opened up into a big plaza with a lively outdoor holiday market. A chorus huddled together in a gazebo, their songs crystallizing on the frosty air as they overlooked dozens of booths filled with food, beer [Recipe], wine, and handmade crafts.

This was a dangerous combination for a hungry teenager.

Although the festivities perked me up a bit, the smell of warm, mulled wine [Recipe] and grilled meats made me downright hungry.

So this was Germany.

Düsseldorf Christmas Market

Schnitzels were everywhere – which, by the way, we cooked when we made Austria [Recipe]. We paired the schnitzel with another dish adored in Germany, Spaetzle [Recipe]. Also available? Any sort of sausage or rouladen (rolled up beef with gravy) [Recipe]. From what I could tell, you had a choice of two sides: sauerkraut or red cabbage [Recipe]. That was it. Both were vinegary, but the red cabbage had a hint of sweetness to it.

After gorging on dinner, we were tempted with sweets – mostly gingerbread cookies [Recipe] and cakes. I looked long and hard, but didn’t spot my favorite – the German Tree Cake (baumtorte) [Recipe]. I have fond memories of making this cake with my mother when I was little, who at this point in my life I hadn’t lived with for the better part of a decade. Made of 20-30 layers of marizpan cake, the baumtorte kept us busy the better part of two afternoons. Which is certainly why I didn’t see it at the outdoor market.

When I finally tucked into bed it was 9:30 pm, but it might as well have been midnight. My muscles ached from the day’s game and my belly was full from the outdoor market.

Photos: Wolfgang Staud, Rainer Driesen, CIA World Factbook, Sasha Martin

Monday Meal Review: Georgia

THE SCENE

“This is gonna be good,” I told myself, sliding the porcelain casserole into the refrigerator. Two pounds of chicken legs swimming in a bath of lemon juice, peanut oil, and Georgian five spice – they’d have the entire night to chill out and absorb Georgian goodness before hitting the grill.

I tucked Ava into bed as quickly as I could, telling Keith to cue a movie, preferably a chick flick. I put on my favorite fuzzy pajamas and crawled under the covers. The opening credits hadn’t even rolled by before the phone rang.

“Don’t pick up!” I said, as he brought the phone to his ear.

It was work.

I rolled my eyes and whispered “tell them you’re busy.”

He didn’t say anything, but listened carefully for a few long minutes. I stared at computer screen, at the frozen faces and words, waiting to be unpaused.

Moments later, he left to work on the city’s 911 phone system. You can’t say you’re busy when 911 calls. Lives are at stake. I understood but, as I watched his taillights disappear down the dark road, I felt sad. So much for Friday night.

Just then my phone went off.

“Go ahead and watch the movie.” it read.

“Only if you’ll eat lemony chicken with me tomorrow,” I texted back.

“I’ll even grill it for you.”

I crawled back into bed. “Deal. I love you.”

“I love you.”

THE FOOD

Georgian Grilled Chicken [Recipe]

What I liked most about this dish:

Crispy, lemony chicken – what’s not to love? I normally don’t enjoy chicken skin, but the citrus infusion is so strong I actually gobbled it up. Plus, the 24 hour marinade makes it easy for entertaining.  You’ll see Ava’s thoughts in this week’s video.

What I liked least about this dish:

Nothing. Mr Picky even manned the grill for me. Sweet.

Georgian 5 spice (Khmeli-Suneli) [Recipe]

What I liked most about this dish:

Khmeli-suneli is a snap to throw together – no need to toast the dried herbs, so the longest part of the recipe is measuring out five spices. You’ll be done in less than five minutes.

What I liked least about this dish:

The first batch got completely used up in the chicken recipe; I should have doubled it so I could add try it in other dishes.

Walnut Cilantro Sauce (Garo) [Recipe]

What I liked most about this dish:

This is a new flavor combination to me and super easy to make. The cilantro reminds me of Latino food, but the spices bring it back over to Eurasia.

What I liked least about this dish:

I found my version of Garo to be too bitter and would cut back on the spices next time. Perhaps with some tweaking I would use this on more dishes as a condiment.

Natural Grape and Walnut Candy (Churchkhela from the Caucasus) [Recipe]

What I liked most about this dish:

Making this candy was fun – especially seeing the changes with each dip and as it dried.  I think it’s a great family project. Ava wanted so badly to get her hands into it and was completely fascinated at the process (even at 1.75 years old).

What I liked least about this dish:

I wish I had dipped it four times instead of just 2. The walnut flavor still dominated the sweet-tart grape coating. Mr. Picky lived up to his nickname on this treat, although I am convinced he would be in love with it if we had made it with peanuts instead of walnuts. But then, it wouldn’t be Georgian anymore.

Ava’s Corner

Garlic and Walnut Sauce | Garo

Makes 4 cups

This bold tasting spread/sauce from Georgia will have your mouth asking “What is in this!”  I couldn’t decide what it reminded me of, which I find exciting (trying new flavors is the purpose of eating the world, A-Z!). The bold flavor of cilantro and walnut are the main body of flavor, with an earthy, almost bitter note from the spices. You can knock the bitter profile back a bit if you use less fenugreek seeds.

Adapted from The Silk Road Gourmet: Volume One: Western and Southern Asia.

Ingredients:

1 bunch cilantro, including stems
4 cloves garlic
2 cups walnuts, chopped
2 cups stock (chicken is traditional, but vegetable is fine for a vegan recipe)
1/4 cup lemon juice

1 1/2 tsp ground coriander
1 1/2- 1 Tbsp fenugreek seeds (add to taste)
1 tsp ground turmeric
salt
pepper

Method:

Welcome to Georgia – this picture shows so many of the characteristic flavors of this beautiful country.

First, blend together the washed cilantro (stems and all) with walnuts, garlic, lemon juice, and stock.

Next, dump in the fenugreek seeds, coriander, and turmeric. The amount pictured can be rather bitter. You might start with half this amount of fenugreek and taste it. Add more if desired.

Next, season liberally with salt and simmer for about 15 minutes.

Serve as a condiment for veggies and meat or…

Enjoy over a slice of hot, toasted bread…

Suddenly…

Very…

Hungry…

P.S. Always give the crumbs to the birds.

Tweet, tweet.

Garlic and Walnut Sauce | Garo
Votes: 0
Rating: 0
You:
Rate this recipe!
Print Recipe
The bold flavor of cilantro and walnut are the main body of flavor, with an earthy, almost bitter note from the spices. You can knock the bitter profile back a bit if you use less fenugreek seeds.
Garlic and Walnut Sauce | Garo
Votes: 0
Rating: 0
You:
Rate this recipe!
Print Recipe
The bold flavor of cilantro and walnut are the main body of flavor, with an earthy, almost bitter note from the spices. You can knock the bitter profile back a bit if you use less fenugreek seeds.
Ingredients
  • 1 bunch fresh cilantro
  • 4 cloves garlic
  • 2 cups walnuts , chopped
  • 2 cups stock , chicken or vegetable
  • 1/4 cup lemon juice
  • 1 1/2 tsp ground coriander
  • 1-1 1/2 Tbsp fenugreek seeds , to taste
  • 1 tsp ground turmeric
  • salt
  • pepper
Servings:
Units:
Instructions
  1. Add all ingredients to blender and blend. Adjust fenugreek to taste
  2. Add to a medium pot, add salt and pepper to taste and simmer for 15 minutes.
  3. Serve as a condiment.