Latest Posts

French Onion Soup | Teardrop Onion Soup

Serves 4

Do you need a good cry? Today is the day. Paris can handle your tears. Trust me, I know. All you have to do is make a pot of French Onion Soup. By the time you slurp your last sip, and crunch on the last of the cheesy crouton, you will be renewed.

After my brother died everything hurt. The thing was, as bad as it felt, I didn’t really know how bad I was hurting. I tried to ignore it. To keep going. I didn’t want to look my grief in the face. It was an ugly, unwieldy monster. If I allowed myself feel the pain and actually let the tears out, I felt weak.

On my brother’s birthday, the first one that came up after he died, I decided to wear all black. I was going to face the pain. I hadn’t even made it half way down the stairs when my foster mom called up to me.

“Little girls don’t wear all black. Go change your clothes.”

She had the thankless job of raising me from the age of 10-19. Her heart was in the right place but, well-intentioned or not, the message I heard was loud and clear. It was not okay to express my grief. In that moment I totally lost my way. I was in uncharted emotional wilderness. I bumped into that crazy emotion called rage.

That’s what happens.

Let me tell you, the more you hold that stuff in, the worse off you are. It comes out, whether you like it or not – into nightmares, substance abuse, and general lack of self-respect.

That’s why it’s so much better to just make a bowl of soup and let it all out. Cry, cry, cry. And then cry some more. This particular recipe is made with white wine, which is always nice on a sad kind of day.

Hugs to you.

Ingredients:

5 onions, sliced thinly
1/2 stick butter
1/8 cup flour (added when onions are caramelized)
1 1/2 cups dry white wine
6 cups water

3 sprigs thyme
1 sprig parsley
bay leaf
salt
pepper

4 slices french bread
4-6 ounces shredded Gruyère cheese

Method:

Slice five onions. Let the urge to cry overtake you.

The fresher the onions, the bigger the tears.

Five onions might be a lot, but it’s totally absolutely worth it.

Cook them – in a lot of butter. It’s the best thing to do with onions. And, just possibly, tears.

Start with a big pot and high heat, but know this – the onions will reduce to almost nothing.

With some luck, your grief will reduce to almost nothing, too.

First, they’ll sweat.

Then they’ll turn golden. Keep going.

And going. It’ll take thirty minutes or so. See all those brown, crusty bits? Yum. That’s where all the flavor is. Don’t rush the process. (the crying OR browning the onions).

Reduce the heat and keep stirring, especially towards the end. You don’t want to burn them.

Take it another shade darker for really great flavor, then stir in the flour for a minute.

Splash on the wine and water. Scrape the crusty bits up off the pot.

And scrape the sad bits off your soul. Release them.

Drop in the herbs. Plenty of fresh thyme, parsley, and a bay leaf. You can tie them together or put them in a little cheesecloth. The French call this a bouquet garni. They remove them after cooking. However… you could chop the parsley and thyme up if you’d prefer to leave the herbs in the soup.

Now that the crusty bits are released, there’s actually room for freshness to move into your heart.

Season with plenty of salt and pepper. Simmer for 20 minutes.

Next, ladle into heatproof bowls.

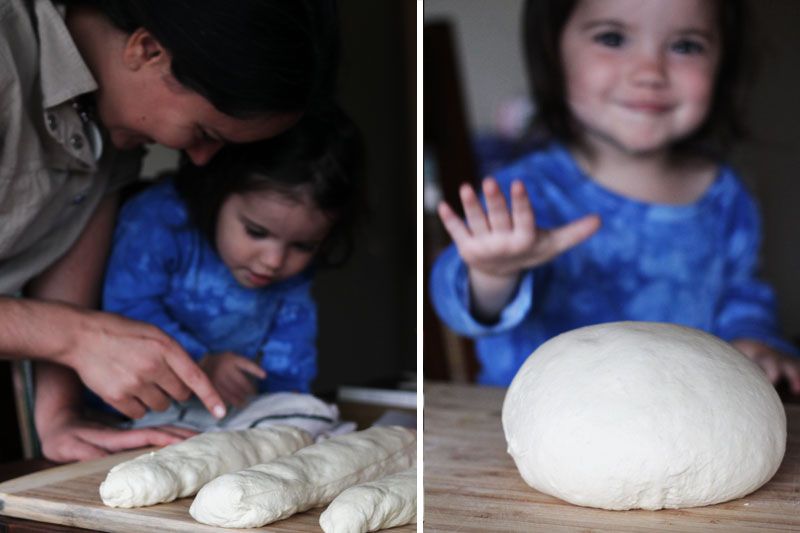
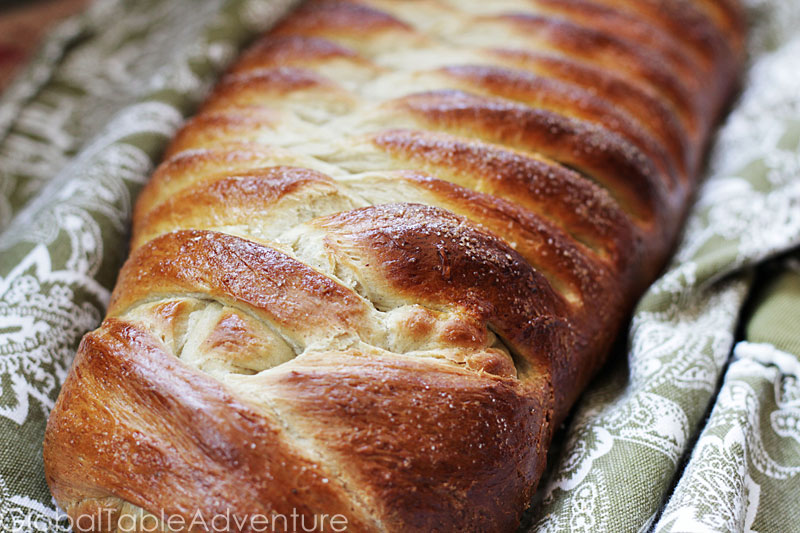
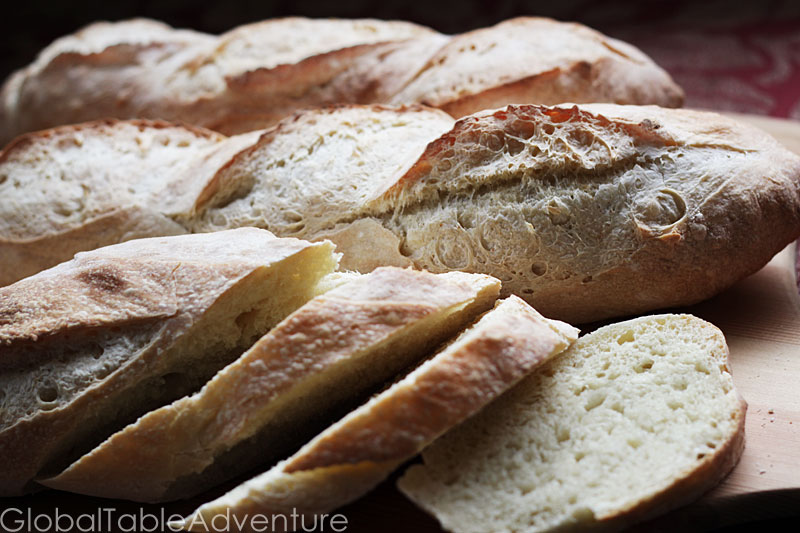
Top with a crusty crouton. This was made with our yummy artisan bread.

Add the cheese… and place under the broiler until browned. You can also bake it until bubbling and browned.

Serve on a cool day, with a big glass of the same wine you cooked it with.

It will restore you before, during, and after a good cry.

I promise.

French Onion Soup | Teardrop Onion Soup
Votes: 0
Rating: 0
You:
Rate this recipe!
Print Recipe
Do you need a good cry? Today is the day. Paris can handle your tears. Trust me, I know. All you have to do is make a pot of French Onion Soup. By the time you slurp your last sip, and crunch on the last of the cheesy crouton, you will be renewed. This particular recipe is made with white wine, which is always nice on a sad kind of day.
Ingredients
  • 5 onions , sliced thinly
  • 1/2 stick butter
  • 1/8 cup all-purpose flour (added when onions are caramelized)
  • 1 1/2 cups white wine (dry)
  • 6 cups water
  • 3 sprigs thyme
  • 1 sprig parsley
  • 1-2 bay leaves
  • 4 slices french bread
  • 4-6 oz Gruyère , shredded
Servings:
Units:
Instructions
  1. Slice the onions and cook in lots of butter. Start with a big pot but know they'll reduce to almost nothing. Cook for around 30 minutes.
  2. Reduce heat and keep stirring, especially towards the end. You don't want to burn them. Take it another shade darker then stir in the flour for minute.
  3. Splash on the wine and water and scrape off the crusty bits off the pot.
  4. Drop in the herbs. Plenty of fresh thyme, parsley, and a bay leaf. You can tie them together or put them in a little cheesecloth. The French call this a bouquet garni. They remove them after cooking. However… you could chop the parsley and thyme up if you’d prefer to leave the herbs in the soup.
  5. Season with plenty of salt and pepper and simmer for about 20 minutes. Ladle into heatproof bowls and top with a crusty crouton and cheese. Place under broiler until the cheese is browned.

To like or to love, that is the question.

Do you want to tell someone you love them in French?

“Je t’aime.”

Do you want to tell someone you like them in French?

“Je t’aime.”

It gets confusing when you’re a geeked out adolescent, trying not to sound too eager when talking about the cute guy in your class.

It matters less when talking about food.

Or family.

In fact, the French language has an important message for all of us.

We shouldn’t just love our loved ones. We should like them, too.

Makes sense to me.

On dealing with nudity, hazelnut praline, and life in France – David Lebovitz

Photos copyright David Lebovitz

David Lebovitz lives a food-lover’s dream in Paris. His site is full of personal stories, incredible recipes, impromptu foodie tours, and insight into the blogging world. His gorgeous photography will make you hungry for brown bread ice cream, salted butter caramels, and strawberries turned into frozen yogurt.

And that’s just the beginning.

With David you can pick your poison. Want candied bacon ice cream? You’re in luck – he’s posted a recipe for it. Too tame? How about a scoop of absinthe ice cream? With recipes like that, you can imagine that he has a great sense of humor – which, I promise you, he does.

As the accomplished author of The Sweet Life in Paris, Ready for Dessert, The Great Book of Chocolate, and more (check out his online store to see all his titles) – I thought you would enjoy hearing his thoughts on food, travel, and cooking.


1. What advice to you have for someone just learning to cook “foreign” food?

Get advice from the locals. When I moved to France, I had no idea what all those strange cuts of meat and various kinds of slippery fish were. (Although some of the fish stump the French as well.) But shopping at the markets, French people are so opinionated that it just takes a simple inquiry to set off a chain reaction of people offering recipes and cooking tips.
.
Of course butchers and fishmongers are outstanding resources as well and I would say to anyone learning to cook in a foreign country: Go to the same food vendors every day so they get to know you, including your likes and dislikes. You’ll get much better service. learn from the experts and likely a few new recipes.
Photos copyright David Lebovitz
.

2. Share one memorable food experience you’ve had in France. What made it memorable?

The first time I had the hazelnut praline paste from Jean-Charles Rochoux I almost cried. Roasted hazelnuts are swirled around in dark caramel, spread out to cool and harden, then ground to a smooth, unctuous paste. He gave me a taste from a small spoon and I ended up buying a few too many jars. It’s heaven in a jar.

3. Were you ever picky? If yes, what foods did/do you avoid? Why? Has anything helped you overcome this?

The only thing I wouldn’t eat as a kid was lobster, which was too bad since I grew up in New England and of course, they were really inexpensive and plentiful back then. I have a lot of regrets in my life, but my early aversion to lobster (which I no longer have) is one of the biggest.

4. What did you eat as a child and how did it influence your career path?

We had Good Seasons salad dressing, which you mixed in a cruet that was marked for how much of each ingredient to add. I believe it was through that green-topped mixing bottle that I developed a passion for measuring ingredients and hence became a baker.
Photos copyright David Lebovitz

5. What’s the best way to handle cultural differences? Share one funny example of a mix-up due to cultural differences.

I am a firm believer in blaming yourself. Yes, it can be humiliating, but I always have to realize I’m a guest in this country and that I need to take responsibility for any and all mistakes. One thing I can’t get used to it being naked around people. Not that people are running around nude here, but someone close to me walks around his mother like that. And I go to an exercise class and we all change in the same place, I’ve been talking to a woman while they’re removing their blouse, then bra, and I’m never sure where to look. I just give them the deer-in-the headlights stare, right in the eyes.

6. Any upcoming projects?

I’ve been hoping to start a small food-based business in Paris but the famed French bureaucracy has already worn me down…and I barely started the search for a space! One real estate agency refused to give me any information about a property that they had which had a big For Rent sign in the window. And to be honest, I’d prefer to save my energy for the actual work, not battling ‘fonctionnaires’ so I just feel resigned that it wasn’t meant to be, unfortunately. I have a few book projects in mind–which I can do pretty much on my own.
All Photos Copyright David Lebovitz.

Artisan French Bread (or diary of a bread-aholic)

Makes about 3 loaves

My toes curled when I took my first bite of French bread – a baguette, still warm from the oven. Even years later – hundreds of baguettes later – I could not understand how my French friend, Julie, was able to restrict herself to one slice with dinner. Her entire family was that way – they’d had good bread their entire lives.

I was unable to be so moderate. Entire baguettes could disappear into my belly in an afternoon. I gained 15 pounds living in Paris, around the skinniest girls in the world. In college I wrote a hundred pages all about the history of artisan bread in France. I was obsessed.

The good news is I learned how to make pretty awesome bread at home. It takes 3 days, but each step is easy.

There are two things which make French bread so amazing.

1) Flavor: Mixing the yeast with a little flour and water ahead of time gives a big flavor boost. This is called a poolish or preferment. Slow and cool yeast development is the secret to good flavor.

2) Texture: Achieving a soft interior and thin, shattering crust. You do this by adding moisture while baking and using steady, high heat. A spray bottle and baking stone are the best we can do in our homes.

This recipe is an adaptation of a King Arthur Flour bread recipe. I’ve been tweaking it for years.

Ingredients:

Poolish:

2 cups flour
1 cup cool water
1/8 tsp active dry yeast

Dough:

3 cups flour
1 cup water
1 1/2 tsp salt
1 tsp yeast

Method (a.k.a. Diary):

Day 1

9:00 pm

I changed into my pj’s and was all settled in to read The Sweet Life in Paris before I remembered – oops! Time to make the poolish (starter).

To make the poolish: In a large bowl, thoroughly mix together 2 cups flour, 1 cup cool water, and 1/8 teaspoon yeast. Cover with a damp towel and let sit in a cool spot for 14-24 hours.

It’ll be thick and doughy.

Keep cool! Try in the basement, by a drafty window, or over a bowl of ice.

9:05 pm

I climbed back in bed and read until sleep overtook me. That was easy!

Day 2

Morning

Ran a few errands. Put the baby down for a nap. I took a peek at the poolish, but decided to garden a little before messing with it. Apparently you can’t actually plant anything new until you remove the leaves and weeds from last year.

Afternoon

Gave up on gardening for a little while.

When the poolish is 2-3 times larger and full of bubbles, add 1 tsp yeast, 1 1/2 tsp salt, 3 cups flour and 1 cup water. Place in large bowl and cover with damp hand towel.

It looks so different from yesterday!

Let’s make a dough ball!

I like to mix it with my hands.

It’ll be really, really sticky.

Don’t be scared.

Flop it around a bit.

This is the “slap and fold method” which works great for wet doughs.

After a few folds, it won’t stick any more. After about ten folds, get most of the goo off your hands and see if it is still sticky. If it is, work in extra flour. You’re looking for a very soft, moist dough. But not sticky. If it is a rainy day – or humid – you will definitely need more flour.

Cover with a damp dish towel. Place over a bowl of ice if you don’t have a cool spot.

Evening

Had a relaxing night not thinking about bread. Ate grilled salmon, watched Bill Cosby, Himself. Laughed a lot when he was talking about parenting. Drank a little wine. Ran over to sniff the bread dough before heading to bed. Smelled great!

Day 3

Morning – about 9 am.

Woke up to miss Ava toddling into my room. We jumped on the bed for a few minutes. Next up – a few minutes of bread making.

Take the dough out of the bowl, slap it around a few times, shape into a ball. Return to bowl, cover it back up with damp hand towel.

Here’s the dough after resting overnight.

The dough is full of bubbles and giant.

It should be airy and soft.

And should easily form a smooth ball. It’s already so different from yesterday – the gluten has developed. Slap it down and fold it a few times. Put it back on the bowl, covered with a damp towel, in a cool spot (or on a bowl of ice).

Next I ate breakfast. Went to baby dance class where we pretended to be elephants and turtles. There was much spinning and clapping.

Noon

After 3 hours the dough looks like this:

Turn it out of the bowl… there are tons of bubbles, Yay!

Cut the dough into 3 pieces and shape into logs. Let rest 20 minutes. Try not to disturb the holes. Be gentle at this point.

Put baking stone in oven and preheat to 450F.

Slit with a razor, spray with water, and bake at 450F until cooked – about 20 minutes. Bake directly on stone or baking sheet.

Eat with French Onion Soup or Ratatouille.

Or all by itself with a view of the garden. Or weeds. Whatever the case may be.

This is your passport to Paris, enjoy!

Artisan French Bread (or diary of a bread-aholic)
Votes: 2
Rating: 5
You:
Rate this recipe!
Print Recipe
There are two things which make French bread so amazing. 1) Flavor: Mixing the yeast with a little flour and water ahead of time gives a big flavor boost. This is called a poolish or preferment. Slow and cool yeast development is the secret to good flavor. 2) Texture: Achieving a soft interior and thin, shattering crust. You do this by adding moisture while baking and using steady, high heat. A spray bottle and baking stone are the best we can do in our homes. This recipe is an adaptation of a King Arthur Flour bread recipe. I’ve been tweaking it for years.
Servings Prep Time
3 loaves 20 minutes
Cook Time Passive Time
20 minutes 3 days
Servings Prep Time
3 loaves 20 minutes
Cook Time Passive Time
20 minutes 3 days
Ingredients
Poolish:
  • 2 cups all-purpose flour
  • 1 cup water (cool)
  • 1/8 tsp active dry yeast
Dough:
  • 3 cups flour
  • 1 cup water (cool)
  • 1 1/2 tsp salt
  • 1 tsp instant-
Servings: loaves
Units:
Instructions
Day 1
  1. To make the poolish: In a large bowl, thoroughly mix together 2 cups flour, 1 cup cool water, and 1/8 teaspoon yeast. Cover with a damp towel and let sit in a cool spot for 14-24 hours.
Day 2
  1. When the poolish is 2-3 times larger and full of bubbles, add 1 tsp yeast, 1 1/2 tsp salt, 3 cups flour and 1 cup water. Use the slap and fold method to form a dough ball. After a few folds, it won’t stick any more. After about ten folds, get most of the goo off your hands and see if it is still sticky. If it is, work in extra flour. You’re looking for a very soft, moist dough. But not sticky. If it is a rainy day – or humid – you will definitely need more flour. Place in large bowl and cover with damp hand towel. Place over a bowl of ice if you don’t have a cool spot.
Day 3
  1. Take the dough out of the bowl, slap it around a few times, shape into a ball. It should be airy and soft. It’s already so different from yesterday – the gluten has developed. Return to bowl, cover it back up with damp hand towel for 3 hours.
  2. Cut the dough into 3 pieces and shape into logs. Let rest 20 minutes. Try not to disturb the holes. Be gentle at this point. Put baking stone in oven and preheat to 450F.
  3. Slit with a razor, spray with water, and bake at 450F until cooked – about 20 minutes. Bake directly on stone or baking sheet.

Menu: France

The look on Ava’s face says it all – a child is never too young to help… to play in the kitchen… to experience the magic of food. Dear readers, thank you for reading.  You came, you voted, and now… without further ado, I present your French menu, sampler style. Thank you for making my belly happy and taking me on a journey back to Paris. Yesterday I laughed and cried. Looking forward to the rest of the week.

Teardrop Onion Soup (French Onion Soup) [Recipe]
This classic Parisian soup is made with little more than wine, water, and onions. We took our cue from Paris’ own Cordon Bleu and left out the beef stock. Instead, a little flour and butter gets mixed in for richness and texture. Fresh thyme adds depth, while a crusty crouton covered with a thin coating of gruyère makes everyone happy.

Ratatouille [Recipe]
Provençal vegetable stew made with eggplant, zucchini, sweet bell peppers, onions, tomatoes, and a healthy dose of olive oil. Enjoy it hot or cold.

Artisan French Bread [Recipe]
Get drunk on French bread in your own home. It’s easy. Just be sure to start three days ahead of time. And be sure to hold the butter. This artisan bread contains only flour, salt, yeast, and water.

Triple Pots de Crème (Chocolate, Espresso & Vanilla) [Recipe]
Unlike rich, heavy Pots de crème you might find in America, a true French recipe is delicate, rather like a custard. Ours brags three flavors – espresso, chocolate, and vanilla. This fun assortment is great for dinner parties.

Bonus: Grapefruit & Ginger Tart [Recipe]
A French inspired tart made with grapefruit curd and gingersnap crust. Traditional tarts would include lemon or orange flavorings.


*All recipes and the meal review will be posted by Monday morning*

About the food of France

I moved to Paris when I was 13, just weeks after my brother died. He was a year and a half older than me. His death was sudden and I was a mess. Paris was not so much a new chapter, as an entirely new book in my life. I wasn’t yet ready for hope, but the distraction of a foreign country proved perfect.

When I stepped off the plane I was tired.  The air was thick and heavy and the cold stone of the surrounding buildings was grey, grey, grey. My French-speaking aunt greeted me with what else, but a cow’s tongue fresh from the meat market. She sliced it thinly and offered me a piece.

“You must be hungry,” she said with a smile.

I was taught to be polite and, so, politely, I declined. I blamed jet lag and fatigue but embarrassment took over. I went to bed and slept for 15 hours.

Not even two weeks later, at a glamorous wedding, I faced my second food Adventure – the rarest piece of filet mignon any child from west of the Atlantic has ever consumed. Not willing to repeat my first refusal, I dutifully ate the filet with sliced baguette. Politeness got me started, but enjoyment kept me going. The meat was soft. Tender. Buttery. Which reminded me, my bread needed butter. Upon asking the waiter, he informed me that “French bread is so good, we don’t need butter.” He was right.

He also refused to get me ketchup for my French fries which, to this day, I still disagree with.

The supermarket confused me. The cheeses were so stinky, I avoided the entire department for the first year. Over towards the meats, cases spilled over with gelatin bound vegetable and meat terrines, whose graphic designs looked straight out of the 1970’s. The produce was lovely but I cared nothing for that at 13 years old. Most of my time was spent over by the baked goods, sniffing at the croissants, fresh baked breads, and sweets.

Instead of hot dogs, street vendors sold crêpes au chocolat and, in the winter, hot roasted chestnuts. Thank goodness for those glorious treats. I regularly burnt my mouth eating them, rather than waiting to let them cool down.

As the years went by, I became more and more Parisian. I cut my hair short, tossed French slang around and hung out with my French friends, eating our snacks and pointing at the tourists.  Some days we split an entire baguette. Not bad for an afternoon snack.

Portions were small – just enough for everyone to almost fill their plate once. A bowl of French onion soup could make a meal. As could a piping hot plate of ratatouille – a healthy blend of eggplant, zucchini, peppers, onions, tomatoes, and garlic.

Perhaps the most fun were the school lunches. I remember filling my tray up with steak haché and frites (rather like a hamburger patty with french fries – but much tastier). Dessert could be a half a grapefruit with sugar on top, or a little cup of fromage blanc (a white cheese product, similar to yogurt, but sweeter) with a drop of blood-red raspberry jam drizzled over the top. Pots de crème, or custards, were everywhere. Crème brûlée and flan were equally divine.

Veggies could include asparagus, leeks, potatoes au gratin (with melted toasted cheese), and mushrooms.

The three and a half years I spent in Paris were my Pheonix. With my brother gone, I was an imploding, fiery mess of rebellion. But… and this is the important part… I had to experience this internal fire to begin on the path of renewal. Paris made room for that.

Photos: Benh LIEU SONG, Roby

Monday Meal Review: Finland

THE SCENE

Rather abruptly, Ava threw up.

She was in her room, but we could hear her all the way in the kitchen.

Keith called out in a panic:

“Sash, could you … come here?”

I excused myself from our guests, bracing for what I knew would be a gruesome sight.

Little did I know…

Blueberries. Were. Everywhere.

Ava, strangely enough, didn’t seem bothered in the slightest. She played with her baby doll while Keith and I scrubbed.

Five minutes later I went back to the kitchen and assured Ruby and her husband, Nivantha, that things were totally fine. Of course the weren’t, but I what else was I supposed to say? That’s what hostesses who grab random strangers off the street do! Understandably, Ruby and her husband weren’t quite buying it and, out of politeness (and I’m sure a little self-preservation), they left.

Finland was most definitely not to blame. Ava had systematically refused the mustard dill sauce and her cup of blueberry milk.  She wouldn’t even look at the rutabaga. The only thing she had eaten was a little salmon and a few fistfuls of blueberries.

I should have seen it coming. A few hours earlier, while Ruby and I were cooking up a storm, Ava made it known that someone had to hold her at all times. Mostly, she insisted that Ruby’s husband hold her.

After Ruby and Nivantha politely excused themselves, I went back to check on Ava and ended up with a second mess of blueberries, this time on my shirt. As we walked back from the laundry room, Ava caught a whiff of the fresh-baked cardamom bread and begged for a piece.

She ate 2 giant pieces and crashed out.

Apparently, no matter how bad things get, bread makes it better.

Especially Finnish bread.

Thanks, Ruby!

THE FOOD

Scandanavian Mustard & Dill Sauce [Recipe]

What I liked most about this dish:

I’m all about mustard and vinegar, so I was in tangy heaven with this sauce. And I rather enjoyed laughing at Mr. Picky’s grimaces. I knew this would be a tough one for him.

What I liked least about this dish:

Not much. There is a ton and a half of fresh dill in the sauce which gives it a haunting, anise flavor. I like it but could see how some might want to tame it down a little.

Maple-Glazed Rutabaga [Recipe]

What I liked most about this dish:

I could eat this all year round  and never see another potato again. Total success. If you want a good, browned rutabaga, don’t stir them very often and crank the heat way up. If you smell charcoal, you’ve gone too far.

What I liked least about this dish:

Nothing.

Cardamom Sweet Bread (Pulla) [Recipe]

What I liked most about this dish:

You can shape Pulla in all sorts of twists and rolls and crazy shapes. This makes it fun. The flavor is such a refreshing change of pace from standard cinnamon buns.

What I liked least about this dish:

The bread is amazing hot. As it cools you’ll find it a bit drier – this is typical and makes it perfect for dunking in coffee – a favorite Finnish breakfast tradition.

Blueberry Milk [Recipe]

What I liked most about this dish:

The flavor was great – and the blue tint to the drink was fun too.

What I liked least about this dish:

Once blended, the drink has a tendency to separate into thick coagulated mixture. Be sure to keep it in the blender until you are ready to pour it. Give it another buzz right before serving to mix it back together. This should help a great deal. But you really do have to drink it right away or it will separate again.

Ava’s Corner

Maple-Glazed Rutabaga

Serves 2-4

You could glaze a hub cap and I’d eat it. The key is to make the glazed item tantalizingly sweet – leave a little mystery. I’m not into savory foods swimming in syrup. This Finnish recipe shows lovely restraint, striking a delicate balance. In fact, shortly after I took my first bite I decided to make this recipe as often as possible for the rest of my life.

Rutabagas come from around northern Central Europe. Maple syrup and butter give the root the most addictive flavor and it makes a great side dish for salmon or roast chicken. A total eye opener. The technique would be lovely with any carb – carrots, potatoes, butternut squash – or even a hearty blend of them all.

Ingredients:

2 lbs rutabaga (about 3 average rutabagas), peeled and cubed
4 Tbsp butter (1/2 stick)
1/8 cup maple syrup
salt
pepper

Method:

Dearest readers, meet the mighty rutabaga. Often passed up in the supermarket. Rarely grown at home. A gnarly thing of beauty. You’ll need to peel it and cube it up – make the pieces evenly sized and all will be well with the world.

Melt butter in pan over medium.

When it crackles, add the rutabagas. Increase the heat to high (or medium high if it seems to be too much) and brown the rutabaga. Try not to stir the darlings too often or they will just steam.

While the browning magic is happening, sprinkle liberally with salt and pepper.

When they are pleasantly browned, add maple syrup, toss and cover. Simmer gently until the rutabagas are tender.

I can’t think of a better side dish. I could have eaten this entire bowl myself.

Serve immediately with friends and loud, booming laughter.

Repeat as often as possible.

Maple-Glazed Rutabaga
Votes: 0
Rating: 0
You:
Rate this recipe!
Print Recipe
You could glaze a hub cap and I’d eat it. The key is to make the glazed item tantalizingly sweet – leave a little mystery. I’m not into savory foods swimming in syrup. This Finnish recipe shows lovely restraint, striking a delicate balance. In fact, shortly after I took my first bite I decided to make this recipe as often as possible for the rest of my life. Rutabagas come from around northern Central Europe. Maple syrup and butter give the root the most addictive flavor and it makes a great side dish for salmon or roast chicken. A total eye opener. The technique would be lovely with any carb – carrots, potatoes, butternut squash – or even a hearty blend of them all.
Servings
2-4 people
Servings
2-4 people
Ingredients
  • 2 lbs rutabaga (about 3 average rutabagas), peeled and cubed
  • 4 Tbsp butter (1/2 stick)
  • 1/8 cup maple syrup
  • salt
  • green bell peppers
Servings: people
Units:
Instructions
  1. Peel and cube your rutabagas and melt butter in a pan over medium. When it crackles, add the rutabagas. Increase the heat to high (or medium high) and brown the rutabaga.
  2. While browning, sprinkle with salt and pepper.
  3. When they are pleasantly browned, add maple syrup, toss and cover. Simmer gently until the rutabagas are tender.

Scandanavian Mustard & Dill Sauce

Makes about 1 1/2 cups

Mustard-lovers unite. This tangy, spicy Scandinavian recipe goes great with meaty salmon. Take the time to buy really excellent mustard – the spicier the better. If you have leftovers try spreading a little on a sandwich. That’s what I did!

Ingredients:

3/4 cup (7 oz) spicy dijon mustard
1 1/2 ounces fresh dill, stems removed and chopped (about 1 cup)
1/8 cup vinegar
1 tsp salt
1 1/2 tsp sugar
3/4 cup oil

Method:

First things first. Start a small herb garden and grow a mound of dill. You’ll be glad you did because this recipe calls for a lot. About 2 of those insanely expensive plastic containers the supermarkets carry.

Once you have your dill, take the stems off. The chop it up nice and fine.

Measure out the spiciest-mustard-you-can-find into a small bowl. I used a true Dijon, but take a gander in local specialty shops. I’m sure you’ll find something just as lovely.

Add the vinegar. Mr Picky and I are so different. At this point he pinched his nose shut, while I was in vinegar bliss.

Next up? Sugar and salt. The sugar helps balance the acidity.

Toss on the chopped dill. It looks a lot like grass clippings, but tastes much better.

Next, whisk in the oil. You can add as much or as little as you like. Keep tasting.

Here’s how I liked mine…

Enjoy with a slab of fresh grilled salmon.

Preferably cooked outside on a sunny afternoon in spring.

(We cooked ours about 5 minutes per side on a medium grill, but timing depends on the salmon’s size).

I’m not exactly sure why this slab of salmon looks like a strange alien tentacle, but I assure you, it tasted wonderful.

Yeah, that was a little too strange.

Here, we’ll just tuck it behind the sauce, like this:

Sometimes you’re a “leading role” kinda fishie.

Sometimes you’re more of a “background player.”

Sorry fishie, today the sauce is most definitely the star.

Refrigerate until needed.

Enjoy with Finnish friends.

If you only have one beer left, share it.

Scandanavian Mustard & Dill Sauce
Votes: 3
Rating: 3
You:
Rate this recipe!
Print Recipe
Mustard-lovers unite. This tangy, spicy Scandinavian recipe goes great with meaty salmon. Take the time to buy really excellent mustard – the spicier the better. If you have leftovers try spreading a little on a sandwich. That’s what I did!
Servings
1 1/2 cups
Servings
1 1/2 cups
Ingredients
  • 3/4 cup spicy dijon mustard (7 oz)
  • 1 1/2 oz fresh dill , stems removed and chopped (about 1 cup)
  • 1/8 cup vinegar
  • 1 tsp salt
  • 1 1/2 tsp sugar
  • 3/4 cup vegetable oil (to taste)
Servings: cups
Units:
Instructions
  1. Once you have your dill, take the stems off. The chop it up nice and fine. Measure out the spiciest-mustard-you-can-find into a small bowl and add the vinegar.
  2. Add sugar and salt then toss in the chopped dill. Whisk in the oil (as much or little as you like).

Finnish Blueberry Milk

Makes about 1 1/2 quarts

The Finns are a healthy bunch. Between foraging for berries and milking cows, it is no wonder that they also enjoy slurping blueberry milk – an antioxidant rich powerhouse of a drink. Not to mention – it’s blue – an underutilized color in cooking. Pretty cool in my book.

This recipe is adapted from The Best of Finnish Cooking. They used half as much milk than I did – which would make a thicker and much bluer mixture. Play around and see what works for you.

Ingredients:

1 pint blueberries
1 quart milk
1-3 Tbsp sugar
1-2 cups ice

Method:

If you have the time, I highly recommend milking a cow for this recipe. There weren’t any available this weekend, so I had to use the old standby – supermarket cow. Whole milk is best.

Borrow a small child to help make this recipe. Miss Ava ate more blueberries than she added to the blender, so – if you do – be sure to buy extra.

Splash on the milk.

Add sugar, to taste. Finnish folk are remarkably healthy, so I only added a tablespoon.

Okay, maybe two.

Next, toss in the ice. I cannot overstate the importance of ice.

Without it your drink will gel up and look like this:

And while you can whisk it back together, you’ll have to drink it fast. Before it separates again.

Trust me, it’s far easier to just add the ice. The more ice you add, the less the drink will gel up.

Serve immediately or take a walk on the Finnish wild side and pour it over a bowl of blueberries and cereal.

This drink would be perfect for a blue-themed holiday. Are there any?

Finnish Blueberry Milk
Votes: 0
Rating: 0
You:
Rate this recipe!
Print Recipe
The Finns are a healthy bunch. Between foraging for berries and milking cows, it is no wonder that they also enjoy slurping blueberry milk – an antioxidant rich powerhouse of a drink. Not to mention – it’s blue – an underutilized color in cooking. Pretty cool in my book.
Servings
1 1/2 quarts
Servings
1 1/2 quarts
Ingredients
  • 1 pint blueberries
  • 1 quart milk
  • 1-3 Tbsp sugar
  • 1-2 cups ice water
Servings: quarts
Units:
Instructions
  1. Throw blueberries in the blender and splash on the milk. Add sugar to taste and then ice.
  2. Blend together and enjoy!

Oh Mämmi, do I have to?

Finns greet Easter with a goopy, black as tar dish called mämmi. If that’s not enough to entice you, let me see if I can adequately describe the flavor. It’s been described as a cross between Guinness and shoe paste. Even with such a distinct look and taste, mämmi is a tradition held seriously enough to warrant protection from the European Union.

Making mämmi is no joke – first you mix rye flour with bitter orange peel, a hint of sweetener, and a few other ingredients. Boiling water gets mixed in and you slowly bake it in a warm oven. Slowly… as in for three hours. Then it has to be whipped until cool. Then it has to sit for a few days. I think there’s some repetition of steps in there somewhere. Finally, and most commonly, it gets served with a splash of cream and a bit of sugar.

Phew.

If grandma goes to the trouble to make you a batch of mämmi, you had better eat it with a smile – goup and all.

Then? You politely ask for seconds.

Now, some Finns simply buy prepared mämmi (it’s available year round).

If grandma takes this shortcut, however, all bets are off.

Photo: Martin Terber

Cardamom Sweet Bread | Pulla

Makes 1 giant loaf (or as many smaller shapes as you’d like)

Pulla is the ultimate Finnish bread dough. Feeling sad? Shape it into a teardrop. Feeling confused? Twist the heck out of it. Feeling like Pippi Longstocking? Braid it! Feeling creative? Shape it into men, women and children. Feeling pregnant? Just make little buns, baby!

There’s also plenty of choice in regard to flavorings. Pulla always tastes of glorious cardamom. After that? You can leave it plain or fill it. Sweeten life up with a bit of brown sugar, butter, and spices (that’s what we opted for in this recipe), or get things movin’ with some prune filling. You can even fill it after baking with a bit of jam and whipped cream. Usually this is assembled “hamburger style” with a bun sliced in half and whipped cream gilding the outer edges of a jam-burger.

What to expect: No matter how you handle it, pulla should not be anywhere as sweet as a cinnamon roll. The soft, rich dough is quite a bit more subtle than that. The dominant flavor will be cardamom, with a background zing of cinnamon and the barest drop of ground cloves. Sugar remains a delicate background flavor.

Note: For a slightly lighter (but less rich) dough, try replacing 1/4 cup of the milk with water.

Ingredients:

For the dough:

4 1/2 -5 cups flour
1/2 cup sugar
2 tsp yeast
4 Tbsp softened butter
2 whole eggs
1 Tbsp ground cardamom
4 cardamom pods, shelled and seeds crushed lightly (about 1/4-1/2 tsp)
1/4 tsp salt
1 1/4 cup warm milk

For the filling:

4 Tbsp softened butter (1/2 stick)
1/4 cup brown sugar
1/2 tsp cinnamon
1/2 tsp nutmeg
1/2 tsp cardamom
pinch cloves

For the top:

1 egg, beaten
1 teaspoon sugar

Method:

Good morning! Today we’re doing a happy pulla dance. In a few short hours you’re belly will thank you. Unless you eat the entire loaf in one sitting.

First, get a genuine 100% half Finnish friend to measure out your ingredients.

Have her add the flour… (start with 4 1/2 cups – add more later, as needed)

Then the sugar…

…and yeast… (you could proof the yeast in the warm milk if you’d like, but I’m a one bowl kind of gal)

Drop in the softened butter…

And crack in the eggs… Hi Ruby! Thanks for being my hand model.

Next, season with loads of cardamom and a bit of salt.

To get even more cardamom goodness in the dough, add cracked cardamom seeds. I would have been happy with double this amount, but Mr Picky might have staged a rebellion.

They look a little like peppercorns once cracked, but taste so much better. Finns like to bite into these little bursts of cardamom sunshine and, after experiencing it myself, I totally agree.

Splash on warm milk. It can’t be hot or you’ll kill the yeast. I simply heated mine on the stove for a minute then set aside until it felt warm not hot.

Mix with a dough hook for 10 minutes on medium speed. This dough cleans the sides of the bowl, but sticks to the bottom until kneaded for the full ten minutes. If after 10 minutes it still hasn’t cleaned the bottom of the bowl, add a bit more flour and mix it in. Let rise for about 1 1/2 hours.

While the yeast gets happy, let’s make the filling.

You’ll need a bunch of tasty spices. That’s fresh ground nutmeg on the right. Mmm. On the left? Cinnamon, cardamom, and just a hit of ground clove.

Add this to brown sugar and softened butter.

Roll the dough out into a rectangle, about 16″ x 12.”

Spread the filling in a strip down the center.

Using a pastry cutter, cut strips on each side (you need the same number of strips on each side). Try to keep the cuts about a 3/4 inch from the filling.

Cross the dough over

Keep going…

… and going… being sure to lift the sides of the dough up as you go. This will give the loaf “walls” to keep the filling from leaking out. If any of your cuts dips down too low, pinch the dough back together or your filling will ooze out.

Pinch the last strips and fold them under.

Do the same with the other end.

Let rise about 20 minutes, then preheat the oven to 350F.

Brush liberally with a beaten egg.

And sprinkle with a happy snowstorm of sugar.

Bake 25-30 minutes

NOTE: You could also bake this at 375F, but it darkens up quite a bit faster. Play around and see what works for you.

Let cool a few minutes before slicing or it will fall apart … which will, most certainly, make you fall apart.

Serve immediately with a cup of hot coffee and…

… lots of silly moustaches.

Happy pulla making, friends!

Cardamom Sweet Bread | Pulla
Votes: 1
Rating: 5
You:
Rate this recipe!
Print Recipe
Pulla is the ultimate Finnish bread dough. Feeling sad? Shape it into a teardrop. Feeling confused? Twist the heck out of it. Feeling like Pippi Longstocking? Braid it! Feeling creative? Shape it into men, women and children. Feeling pregnant? Just make little buns, baby! There’s also plenty of choice in regard to flavorings. Pulla always tastes of glorious cardamom. After that? You can leave it plain or fill it. Sweeten life up with a bit of brown sugar, butter, and spices (that’s what we opted for in this recipe), or get things movin’ with some prune filling. You can even fill it after baking with a bit of jam and whipped cream. Usually this is assembled “hamburger style” with a bun sliced in half and whipped cream gilding the outer edges of a jam-burger. What to expect: No matter how you handle it, pulla should not be anywhere as sweet as a cinnamon roll. The soft, rich dough is quite a bit more subtle than that. The dominant flavor will be cardamom, with a background zing of cinnamon and the barest drop of ground cloves. Sugar remains a delicate background flavor. Note: For a slightly lighter (but less rich) dough, try replacing 1/4 cup of the milk with water.
Servings Prep Time
1 giant loaf 30 minutes
Cook Time Passive Time
25-30 minutes 2 hours
Servings Prep Time
1 giant loaf 30 minutes
Cook Time Passive Time
25-30 minutes 2 hours
Ingredients
For the dough:
  • 4 1/2 - 5 cups all-purpose flour
  • 1/2 cup sugar
  • 2 tsp instant dry yeast
  • 4 Tbsp butter , softened
  • 2 whole eggs
  • 1 Tbsp ground cardamom
  • 4 cardamom pods , shelled and seeds crushed lightly
  • 1/4 tsp salt
  • 1 1/4 cup milk , warmed
For the filling:
  • 4 Tbsp butter , softened
  • 1/4 cup brown sugar
  • 1/2 tsp ground cinnamon
  • 1/2 tsp ground nutmeg
  • 1/2 tsp ground cardamom
  • pinch ground cloves
For the top:
  • 1 egg , beaten
  • 1 tsp sugar
Servings: giant loaf
Units:
Instructions
Prepare the dough:
  1. Add all ingredients to a large bowl (proof yeast if desired).
  2. Mix with a dough hook for 10 minutes on medium speed. This dough cleans the sides of the bowl, but sticks to the bottom until kneaded for the full ten minutes. If after 10 minutes it still hasn’t cleaned the bottom of the bowl, add a bit more flour and mix it in. Let rise for about 1 1/2 hours.
For the filling:
  1. Mix all ingredients in a small bowl.
To assemble:
  1. Roll the dough out into a rectangle, about 16″ x 12.” Spread the filling in a strip down the center.
  2. Using a pastry cutter, cut strips on each side (you need the same number of strips on each side). Try to keep the cuts about a 3/4 inch from the filling.
  3. Cross the strips of dough over in a herringbone pattern. Be sure to lift the sides of dough up as you go. This will give the loaf "walls" to keep the filling from leaking out. If any of your cuts dips down too low, pinch the dough back together or your filling will ooze out.
  4. Pinch the last strips and fold them under. Do the same with the other end.
  5. Let rise about 20 minutes, then preheat the oven to 350F. Brush liberally with a beaten egg. And sprinkle with a happy snowstorm of sugar.
  6. Bake 25-30 minutes NOTE: You could also bake this at 375F, but it darkens up quite a bit faster. Play around and see what works for you. Let cool a few minutes before slicing or it will fall apart.
  7. Serve immediately with a cup of hot coffee.